Work Log
- DEVELOPMENT (most recent events listed first)
- 1/5/2021: Added to the Helpful Links section.
- 12/10/2019: Added to the Helpful Links section.
- 5/15/2019: Added to the Helpful Links section.
- 1/8/2019: Added to the Helpful Links section.
- 12/4/2018: Removed broken link from the Helpful Links section.
- 9/19/2018: Updated the redirects section.
- 7/18/2018: Added to the Helpful Links section.
- 7/3/2018: Updated the Embedding Media and HTML5 sections to use present and supported audio and video files.
- 5/1/2018: Updated the section about Securing a Website with a new link for the htpasswd.exe since the old link was deleted.
- 4/10/2018: Updated the Perl/CGI site to feature multi-line comments in Perl.
- 3/12/2018: Added to the Helpful Links section.
- 12/15/2017: Added to the Helpful Links section.
- 9/12/2017: Created the external subroutine sub-section on the Perl/CGI site.
- 8/4/2017: Removal of broken link.
- 5/4/2017: Removed broken HTML5 links, which used to link to pages now removed from W3Schools.com.
- 5/3/2017: Added to the Helpful Links section.
- 3/31/2017: Added to the Helpful Links section and removed/replaced broken links. Note: http://tech.beacondeacon.com is where I post code and technical items most of the time.
- 3/4/2015: Put a prominent link to http://tech.beacondeacon.com where I post other code and technical items.
- 12/19/2014: Added the Org Chart section.
- 10/22/2014: Updated the Securing a Web Site (.htaccess) section with updated code for .htaccess files.
- 5/14/2014: Updated to the 80th version of Tidbits with a new section about jQuery.
- 5/12/2014: Added to the Helpful Links section.
- 3/25/2014: Added a section for CSS 3 Keyframes and Animation, bringing the site to the 80th version. Also added a CSS-only slideshow demo, which uses CSS3 animations.
- 2/7/2014: Created the Is my server down (404 error)? section on the Perl/CGI site.
- 1/24/2014: Updated the HTML5 section in regards to how to center images, videos, etc., by using a container styled text-align: center with child elements styled display: inline;
- 11/13/2013: Removed CSS3 sections that are not functional in current browsers.
- 10/11/2013: Removed personal email from examples using email in lieu of a generic email example. Further improved navigation on the Perl/CGI site.
- 7/30/2013: Updated the code under CSS3 Transform to demonstrate the use of transform: translate3d and rotateX in a "roll link".
- 6/20/2013: Updated the code under Delayed Button to be more standardized and work more consistently. Added a link to my new site tech @ Beacon Deacon under Additional Helpful Links.
- 6/6/2013: Created the Calling/embedding Perl in HTML section and improved navigation on the Perl/CGI site.
- 5/31/2013: Added information about the :empty pseudo-class to the Pseudo-Classes section. Added information about descendants and siblings to the once named Hierarchies section, now renamed Hierarchies/Descendants/Siblings.
- 5/24/2012: Created the Shell Scripts and Commands section of the Perl/CGI site.
- 5/16/2013: Modified Fontswap Section, indicating these are older methods.
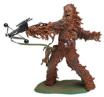
- 5/15/2013: Modified Changing/Appending Text Section and corrected the spelling of Wookiee (to properly have 2 e's) throughout the site.
- 4/22/2013: Updated z-index and absolute/relative positioning section to include improved JavaScript code using parameters for the absolute positioning example.
- 4/13/2013: Updated to the 79th version of Tidbits: I added :not Selector section to the CSS3 Section as well as made edits, corrections, additions and clarifications (box-sizing reference, nth-of-type, transform, clarification and correction about pseudo-classes versus pseudo-elements).
- 4/4/2013: Updated .htaccess-related sections: Securing a Web Site, Server Side Includes (SSI) and redirects (including 404 error document).
- 3/21/2013: Updated the Perl site.
- 2/14/2013: Updated the Detect Flash section with code that is useful for mobile devices (and included my graphic flashsucks_byJamieJohnson.gif.
- 11/19/2012: Updated the Parameters (param) section of the Perl/CGI site.
- 11/7/2012: Corrected Media Queries section. Make sure to have @media screen, not just @media when writing media queries.
- 10/30/2012: Worthy of the iteration of the 78th version of Tidbits, I updated CSS3 sub-section, adding the following:
- 10/26/2012: Updated CSS id sub-section, specifying good conventions for coding with id and classes. Updated Font Weight and Background Images to allow code to properly render a positioned background for a page. Updated Spacing, Text-Transformation and Text-Decoration with updated narrative. Added to Gradients.
- 10/11/2012: Worthy of iterating to the 77th version of Tidbits, I added to the CSS3 Section the following: Gradients and Media Queries which are used in Responsive Web Design (RWD).
- 9/24/2012: Added to the Helpful Links section.
- 8/10/2012: Made changes to the sections for radio buttons, checkboxes and the form summary, noting that I can use the name attribute in input types of radio as it is not deprecated in this usage, but I cannot use multiple identifiers as they are intended to be unique.
- 4/30/2012: Added HTML5 Structure to the HTML5 section to show the basic structure of an HTML5 document and also updated other HTML5 sections.
- 2/14/2012: Removed the inline running of the JavaFX Clock from this page and restricted it to my Clocks! page to enhance load time of this site.
- 11/3/2011: Added to the CSS section the following: height and width as well as border and outline. Added more content to the CSS section dealing with background images.
- 10/26/2011: Corrected code in the CSS General Section to be both conventional and truly compatible across modern browsers. Also added some more detail to the vertical alignment area in the HTML5 section.
- 10/17/2011: Added a CSS3 sub-section under the CSS section, bringing about the 76th version of Tidbits.
- 9/8/2011: Added to the XSL section.
- 9/6/2011: Added to the XSL and Helpful Links sections.
- 9/1/2011: Updated the Redirecting section to show how to use .htaccess RedirectMatch to redirect a .pdf file to a web page.
- 8/17/2011: Added a new section for my own Fundraising Thermometer by Jamie Johnson and a standalone sub-page. This increments Tidbits to the 75th version.
- 6/20/2011: Moved Tidbits from http://people.jmu.edu/johns2ja/Tidbits.htm to http://educ.jmu.edu/~johns2ja/Tidbits.htm
- 5/27/2011: Updated the Arrays & Loops section of the Perl/CGI site. Styled some of the menu itmes to more quickly find them.
- 5/19/2011: Updated Sending e-mail with JavaScript section to include URL-encoding references. Updated Analog Clock using Flash and Embedding Multimedia sections with updated embed coding
- 3/24/2011: Corrected a link in the Helpful Links section.
- 2/16/2011: Added to the XSL and Helpful Links sections.
- 2/10/2011: Added to the XSL section.
- 11/19/2010: Added to the XSL and Helpful Links sections.
- 11/16/2010: Added to the HTML5 and Forms - A Summary sections additional information about input types and new attributes when considering HTML5.
- 11/10/2010: Made corrections in code for the section Use of id over class.
- 11/3/2010: Modified the HTML5 section and the embedding media section.
- 11/2/2010: Added to the XSL, HTML5 and Helpful Links sections.
- 11/1/2010: Developed the 74th version of Tidbits with the addition of the XSL section.
- 10/15/2010: Modified the Color Comparison Utility to use a more comprehensive color chart in one of its frames as well as to offer another resource link.
- 10/8/2010: Modified the Securing a Web Site section to show another method to force SSL/HTTPS and allow ONLY a generic user name from a users file using .htaccess.
- 10/4/2010: Modified the new HTML5 section and added HTML5 notes to the Embedding Media section and the Forms - A Summary section.
- 10/1/2010: Developed the 73rd version of Tidbits with the addtion of the HTML5 section as well as notes throughout the document regarding HTML5.
- 9/30/2010: Added Fiddle Widdle | Browse CSS Templates to the Helpful Links section.
- 7/9/2010: Developed the 72nd version of Tidbits with a new section: Sharing on Social Sites/Like Button.
- 4/29/2010: Renamed Redirecting a page to Redirecting after adding additional .htaccess code related to file-by-file redirection from an old site to a new site.
- 4/21/2010: Corrected code for the absolute positioning example in the z-index and absolute/relative positioning section.
- 3/30/2010: Corrected documentation for Perl: Arrays & Loops.
- 3/24/2010: Developed the 71st version of Tidbits, adding a section for Search Code. Also improved layout for the Analog Clock, fixed the code (updated Windows Media code, added identifiers for QuickTime and FLV code, added standard code for embedding YouTube videos) for the Embedding Media section.
- 3/15/2010: Corrected to the Z-Index and Absolute/Relative Positioning section documentation about CSS clip.
- 3/12/2010: Added to the Z-Index and Absolute/Relative Positioning section a blurb about using CSS clip in conjunction with absolute positioning.
- 2/25/2010: Enhanced the Color Comparison Utility with improved control panel functionality. Also, due to the use of this tool by others, added it to the Dynamic Links section of the CSS section as well as provided it as a link in the main menu.
- 2/15/2010: Enhanced the Color Comparison Utility with a control panel feature.
- 1/7/2010: Added new clocks to the Clocks! page thanks to http://planet-source-code.com/
- 12/22/2009: Added a note about applying opacity to text in Internet Explorer in the Faded Images & Text (which is also the new name for that section with the addition of "& Text").
- 12/4/2009: Added to the ASP site a page showing code to determine if a URL exists.
- 12/2/2009: Added a browse button to HTML Buttons.
- 11/3/2009: Added a new clock widget (by Widgetboxto my Clocks! Page.
- 11/2/2009: Updated the Server-Side Include section with different verbiage and a sub-page.
- 10/28/2009: Developed the 70th version of Tidbits, adding an ASP sub-site.
- 10/26/2009: Added a link to CSS Background Color section: the Color Comparison Utility I wrote.
- 10/20/2009: Developed the 69th version of Tidbits, adding a section on detecting Flash.
- 10/8/2009: Added a quick note about creating a simple random whole number to the Synchronized Randomizer section. Added code to embed FLV files to the Embedding Media section.
- 9/18/2009: Developed the 68th version, adding to the CSS section information about CSS precedence/priority and the !important syntax.
- 8/20/2009: Developed the 67th version of this site with the following items: Added content to the Checking for Browser Compatibility section for Using CSS to check for IE. Also updated the Style Sheets and Span section to have a link pointing to this practical use of CSS. I then renamed the section and menu item to Browser Detection. Also renamed the Style Sheets and span section to Cascading Style Sheets (CSS). I felt that all these additions/changes warranted a version incrementation.
- 8/18/2009: Added a Perl/CGI version to the Redirecting a Page Section which does not require reprinting a header.
- 8/17/2009: Added a section for Cookies to the Perl & CGI page.
- 8/7/2009: Corrected Windows Media Video embedding code in the Embedding Media in a Web Page section.
- 7/23/2009: Added a section for Encryption & Decryption to the Perl & CGI page.
- 7/22/2009: Added a sub-section for Case Statements/Passing params via links to the Perl & CGI page.
- 6/17/2009: Simplified and streamlined Hover Boxes code and linked to an implementation of it at http://beacondeacon.com.
- 6/16/2009: Updated the SSI (Server-Side Include) information to mention its use on Windows/IIS servers. Also updated the Securing a Website using .htaccess Section with documentation of a cgi script and additional .htaccess lines to force https and use SSL.
- 6/12/2009: Added a graphical application of Hover Boxes to the Hover Boxes section.
- 6/10/2009: Wrote and added a fun innerHTML example to the section about Changing/Appending Text.
- 5/14/2009: Developed the 66th version of this page by including a new section: Hover Boxes where I wrote CSS and JavaScript for a dynamic effect when hovering over "box" objects.
- 4/27/2009: Updated the section about Securing a Website with a new link for the htpasswd.exe utility since the file fails to be functional when downloaded from the new IIS server.
- 4/24/2009: After moving Tidbits to the new server, image swapping distorted images, so I amended the code for cases where image swapping behaves in this manner.
- 4/22/2009: Moved Tidbits from http://peregrin.jmu.edu/~johns2ja/Tidbits.htm to http://people.jmu.edu/johns2ja/Tidbits.htm
- 4/17/2009: Developed the 65th version of this page by including a new section: JavaFX Clock. I also created a Clocks! page with all of the clocks on this page shown together.
- 4/10/2009: Added 2 tablespoons to the Helpful Links section. I then added a note regarding that site's example of unobtrusive JavaScript example to the CSS Resources Section.
- 4/3/2009: Added code for cross-browser and cross-platform compatibility for Faded Images.
- 3/18/2009: Corrected an error in the code for the Using JavaScript to Send E-mail section and also added information about relative positioning to the CSS section, which specifically links to information about z-index, absolute/relative positioning.
- 1/13/2009: Developed the 64th version of this page by including onerror in the Throw Function section and then renaming it Throw Function and Error Checking. I also added a section for E-mail Address Validation. Finally, added a section for Create Your Own Objects in JavaScript.
- 1/9/2009: Added material to the Browser Compatibility Section, which includes code that uses DOM to provide information about the browser and system. Also added a note at the bottom of the Forms Summary Section about using onsubmit to validate a form before the action is executed.
- 1/7/2009: Added material to the Perl & CGI page, namely useful CGI code for use with CSV-like databases.
- 12/2008: Added material to the Perl & CGI page as I continue its development.
- 11/2008: Added various resources and sections to the Perl & CGI page as I continue its development.
- 11/20/2008: Developed the 63rd version of this page by standardizing some of the JS code throughout the page where it made sense to (some of the code by its nature is non-standard). Most specifically, I changed more examples to use the document.getElementById('elementID') method in JS instead of document.formID.elementId or document.imgID.src. Using getElementById follows W3C standards.
- 11/19/2008: Added notes/code to the Style Sheets Section and IE Conditional Statements Section to show how to make CSS properties only apply in IE.
- 11/11/2008: Made notes about how innerHTML is better than using nodes to modify/append text in the Changing/Appending Text Section. Also added an innerHTML example of appending text to that section. Changed deprecated URLs (i.e. members.aol.com) used in drop-down menu examples to current URLs.
- 10/2008: Added various resources and sections to the Perl & CGI page as I continue its development.
- 10/24/2008: Made corrections in the Background Image Slideshow section and brought the code for Analog Clock using Flash section to standard and improved layout after removing Macromedia from the title of that section. Also brought the code for Embedding Media in a Web Page section to standard and updated the Introduction to XHTML section regarding deprecated tags (<b> is still OK while <embed> is not, the latter being a reason for the other updates done this day).
- 10/23/2008: Added http://www.koders.com/ to the Additional Helpful Links section.
- 10/22/2008: Added to a Perl/CGI version to the Redirecting a Page Section.
- 9/26/2008: Repaired some CSS so that anchors and view appear properly in Internet Explorer on the Perl & CGI sub-site.
- 9/19/2008: Developed the 62nd version of my Tidbits page to include a new sub-section under Style Sheets & Span about CSS Round Corners (without images)! Also added to the Helpful Links Section.
- 9/18/2008: Added http://www.perl.org/books/beginning-perl/ as a resource on the Perl & CGI page after adding escape codes to the top of that page.
- 9/16/2008: Added http://www.javascriptkit.com/ to the Additional Helpful Links section.
- 9/8/2008: Clarified the .htaccess RedirecMatch in the Redirecting a Page Section and specifying a user against LDAP in the Securing a Web Page (using .htaccess) Section.
- 9/5/2008: Added a little more explanation and links to the SSI Section. Also changed the CSS for the Perl/CGI sub-site to it will be easier to see code that extends off the screen and so it is more useful on screens with smaller resolutions. And I improved how this worklog opens up when the link to open it is towards the top of the screen.
- 8/21/2008: Added to the Additional Helpful Links section.
- 8/12/2008: Added http://www.webdesignerwall.com/ to Additional Helpful Links section.
- 8/11/2008: Developed the 61st version of my Tidbits page to include a section for Refreshing a Page with thanks to Tony Van Noordt, who uses Tidbits.
- 8/8/2008: Developed the 60th version of my Tidbits page to include a section for Internet Explorer Conditional Statements and adding to Additional Helpful Links.
- 7/25/2008: Developed the 59th version of my Tidbits page to include a link to a new sub-site about Perl and CGI scripting.
- 7/23/2008: Added content for how to use .htaccess to redirect a page.
- 4/10/2008: Added additional "hover menus" that combine various elements shown in this page. One has clickable options which drop-down sub-options. The other involves hovering over the main option and a menu is displayed.
- 3/11/2008: Improved coding for case statements under the Case Statements section. Also added some narration regarding use of display to hide under the Displays: inline versus block section. Then, under the Hiding Text section, added a sub-header so users can more easily find the information for using display to show and hide.
- 1/24/2008: Improved coding for embedding QuickTime videos under the Embedding Media in a Web Page section.
- 12/13/2007: Developed the 58th version of my Tidbits page to include the following:
- Updated CSS font-weight and background-image section.
- Added information to CSS section about pseudo-classes.
- Clarification: Made in-line styling into internal and in-line styling.
- Corrected z-index section sample coding error.
- Removed IE hack for inset on hover menu comment since IE is now compliant with this CSS feature.
- Corrected colors to better see styling effects for vertical hover menus.
- Added CSS sub section dealing with spacing, text transformation, and text decoration.
- Renamed the Floating Mail section Floating Mail/Moving Box and added a helpful link to a simpler method.
- Added CSS sub section developer space (only viewable in the source) for more efficient future CSS development.
- 11/9-11/15/2007: Developed the 57th version of my Tidbits page to include coding regarding screen resolution as well as information about "hacks" and "bugs". Also added Work Log.
- 10/23-11/9/2007: Updated Tidbits page (version 56):
- Added information about the this keyword in JavaScript.
- Added innerHTML method for text alterations.
- Added detail for a for loop.
- Added a reference to a Flash example for embedding media.
- Clarified identifiers used in the example showing how to change an external stylesheet using script.
- Corrected Case Statements section.
- Corrected some of the cut-and-paste script.
- 9/4/2007: Updated the 55th version of the Tidbits page, improving accessibility and alt-like effects in non-IE browsers, adding http://www.htmldog.com/ as a resource link, and adding a section addressing alt and title as well as abbr and acronym tags.
- 8/22/2007: Added display method under hiding text. Enhanced CSS sub-section navigation by better connecting the Hiding Text and Overflow and Visibility sections, even renaming Overflow and Visibility to Overflow, Visibility, and Hiding.
- 8/20/2007: Fixed broken CSS anchor links in the Hover Menu section.
- 7/23-7/26/2007: Developed the 54th version of my Tidbits page, rearranging the Stylesheets section, adding a sub-section to it describing how to use CSS to address overflow and visibility behaviors, adding a section related to user-created objects in JavaScript, improving navigation for ease-of-use in the Stylesheets section, adding to the browser compatibility section offering a script to show plug-ins and filenames associated with a browser, adding examples for hiding text and changing/appending text, adding mathematical operators to the section about conditional statements in JavaScript, and adding alternative coding to entities and a link on the entities sub-page.
- 6/20/2007: Updated Tidbits page to the 53rd version adding a section on CSS z-index and absolute positioning, adding navigational buttons to the Buttons with Functions section, and adding a HOT TIP for use of the onunload event handler (shown in the Using JavaScript to send e-mail section). Added to the image swapping section showing how to pre-load images. Also added http://www.howtocreate.co.uk/ under helpful links.
- 6/18/2007: Added additional helpful links and an update to the conditional statements section (No version implementation since no new section).
- 5/23/2007: Developed the 52nd version of Tidbits to include DZone and jQuery, two reputable web development sites as well as a section on Modification Date for a page that can be found using JavaScript.
- 5/16/2007: Followed up with the 51st version with sections on timing and cookies.
- 5/9/2007: Developed the 50th version of Tidbits to include how to change text visibility.
- 3/29/2007: Updated to version 49 (110001) to include a link to some original material of mine where I demonstrate how to use CSS to emulate JavaScript image manipulation and it works even if JavaScript is disabled!
- 2/15/2007: Updated an already existent section of Tidbits to show how to dynamically change stylesheets while reviewing a page using scripting and document elements.
- 1/31-2/5/2007: Completed the 48th version of my Tidbits page, adding JavaScript special characters to the strings section, adding webpage assignment to the Buttons with Functions section, simplified Image Swapping using JavaScript, TextArea selection and focus using the respective JavaScript functions, and error-handling user input using the Throw function.
- 11/7-12/5/2006: Updated Tidbits with additional helpful links - a Web Page Analyzer tool, a Page Size Checker tool (which includes a link to an HTML Purifier tool), and Mozilla Developer Center.
- 10/24-11/7/2006: Updated Tidbits, not to a newer version, but with a minor addition regarding UTF character encoding in the XHTML section that I found helpful in pushing coding closer to the XHTML standard. Refined the section on opening a pop-up window. Also added a helpful tutorial link and alphabetized the tutorial links for better use. Decided shortly after this to not increment the Tidbits version unless there is a new section added, with some exceptions.
- 9/26-10/10/2006: Developed the forty-seventh version of my Tidbits page at, adding a section on Forgotten HTML Tags & Entities (Symbols) -- fieldset, legend, base, tt, q, entities/symbols - as well as updating the redirection section.
- 9/12-9/26/2006: Developed the forty-fifth thru forty-sixth versions of my Tidbits page, showing code revealing how to detect Safari browsers directly.
- 8/15-8/29/2006: After teaching myself additional CSS, I developed the forty-third through forty-fourth versions of my Tidbits page, adding more to CSS coding: comments, display types, border styles, and active content that does not require scripting. I specifically added a new section with CSS hover menus, both vertical and horizontal, that are dynamic, but use only CSS! I also added to CSS section where I describe use of id usage of CSS as opposed to class usage.
- 7/4-7/18/2006: Developed the forty-second version of my Tidbits page, adding some new material I learned about CSS coding where default inline and block element behaviors can be altered.
- 6/6-6/20/2006: Cleaned up a paragraph in the mapping section (format and some minor content).
- 5/9-5/23/2006: Completed the 41st version of my Tidbits page. Added a section introducing XHTML standards, further brought things closer to XHTML compliance, corrected an errant script, modified the layout for ease of use, and added some additional CSS coding examples. Also added several more helpful links.
- 4/25-5/9/2006: Made a major update to my Tidbits page (40th version). The new version includes a cross-browser compatible disabling of right clicking, a titlebar ticker, printing a page using a link or button, floating mail, scrolling background, a slideshow, and some very basic XML. I also added how to convert strings to numbers, which aids in calculation of a score based on user input such as in an assessment. The new version also includes several more code-helping links and follows XHMTL standards more closely.
- 4/11-4/25/2006: Completed the 39th version of my Tidbits page, adding coding to have a delayed button as in when you want someone to be at a page for awhile before allowing the button to be clicked.
- 3/28-4/11/2006: Multiple version increments:
- Completed the 38th version of my Tidbits page, correcting JavaScript tags to meet current standards and adding a section on Strings as well as adding to the browser compatibility section.
- I completed the 37th version of my Tidbits page, amending the SSI section to have more useful coding present, i.e., a page framework including the SSI. This is much more useful when generating SSI-based pages. This allows for a cut-and-paste solution instead of having to download a template or borrow from other SSI pages in this directory.
- Completed the 36th version of my Tidbits page, creating a section for TH and Caption tags in tables and adding a link to the HTML Help Guide by the Web Design Group to the helpful links on the Tidbits page.
- 2/28-3/14/2006: Completed the 35th version of my Tidbits page, creating a section for Authenticators, programs I wrote with HTML and JavaScript where a user has to authenticate with a code randomly and newly generated on each visit a web page in order to proceed.
- 2/14/2006: Multiple version increments:
- Reviewed a document regarding teaching myself advanced forms in HTML and CSS. Added this information and a sample to the 34th version of my Tidbits page.
- Completed the thirty-third version of my Tidbits page, adding advanced CSS to the Style Sheets section showing how CSS can be used to emulate tables and repairing several internal links.
- 1/31-2/14/2006: Multiple version increments:
- Completed the thirty-second version of my Tidbits page, adding an additional drop down menu that features thumbnails that change based on selection (thus enhancing the Drop Down Menu section) that is compatible with IE, Safari, and Firefox. I also added a new section to show those who code two methods how to check to see if JavaScript is enabled.
- Completed the thirty-first version of my Tidbits page, adding a section where HTML FORM buttons have individualized functionality using JavaScript.
- Completed the thirtieth version of my Tidbits page, refining CSS coding and JavaScript in the Font Swap section to make increasing or decreasing a font size compatible with Firefox and Safari browsers as well as with Internet Explorer. Also added to this section coding where one can alter the size and color and style/family/type of the text within a page.
- Created the 29th version of my Tidbits page at to include consistent, current, and compliant CSS coding. I added such coding to the Style Sheets section to show how one can make features that are readily available in IE to be available in non-IE browsers, as well.
- 1/17-1/31/2006: Multiple version increments:
- Created the twenty-eighth version of my Tidbits page, adding significant content to the draggable images section and making it also include draggable content where a user can actually re-position tables, text, images, or anything else that can be placed in a tag as long as the proper class is given. This makes dragging content much easier than with the earlier example in that section.
- Created the 27th version of my Tidbits page, correcting a menu error, deprecated coding, and adding a section on writing a page with HTML/JavaScript that allows the user to change the font size on the web page.
- 11/8-11/22/2005: Multiple version increments:
- Completed the twenty-sixth version of my Tidbits page, adding check boxes, drop down menus, radio buttons, textareas, and text input to the cut-and-paste coding.
- Completed the twenty-fifth version of my Tidbits page, adding a section about embedding media in web pages and improving the menu view.
- 10/25-11/8/2005: Completed twenty-fourth version of my Tidbits page, adding even more material for style sheets, namely background colored highlighting during a mouse hover.
- 10/11-10/25/2005: Multiple version increments:
- Completed twenty-third version of my Tidbits page, adding more material for style sheets, namely using an external style sheet so that multiple pages can be styled with only one file. Also added a web tutorials link under Additional Helpful Links and moved the Additional Helpful Links in a more prominent place for users to find.
- Completed twenty-second version of my Tidbits page, adding a feature showing users how to "fade" between pages in Internet Explorer using just a line of HTML. Tidbits also features a script to check for Browser compatibility and determine actions based on compatibility.
- Completed twenty-first version of my Tidbits page, adding helpful tutorial links for HTML and Java Script, renaming the site to "Tidbits! (JavaScript, HTML, and more)" to better reflect the page, adding more material for style sheets, and adding a new section dealing with JavaScript if Statements in detail.
- 9/27-10/11/2005: Multiple version increments:
- Tested scripts from my Tidbits page for browser compatibility with Firefox, IE, and Safari to see how the different browsers behaved. Updated the twentieth version of my Tidbits page, which is used by persons for JavaScripting and web development. This version features hovering text and posted icons for each item on the Tidbits page to assist developers with browser compatibility.
- Updated the nineteenth version of my Tidbits page, which is used by persons for JavaScripting and web development. This version features using case statements in JavaScript.
- Updated the eighteenth version of my Tidbits page, which is used by persons for JavaScripting and web development. The newest version features more detail on Style Sheets. It also includes details for HTML and non-HTML tickers and a more user-friendly menu.
- 9/13-9/27/2005: Multiple version increments:
- Updated the fifteenth through seventeenth versions of http://educ.jmu.edu/~johns2ja/Tidbits.htm (a.k.a. my Tidbits page), which is used by persons for Javascripting and web development.
- These updates included:
•Added a C-script for a Browse button to Tidbits page as an extra tool for persons to use if needed. Still need to work out some bugs, though.
• Developed a script that is on my Tidbits page for sending preformatted e-mail to a determined user or users with a pre-determined subject and a pre-formatted body where the user can add input to the body.
•JavaScript material.
- 8/30-9/13/2005: Added the following sections: Mapping on a Web Page, JavaScript Loop and Alert, and Writing a file based on prompt in JavaScript.
- 7/19-8/2/2005: Researched Web Page Security using .htaccess files and provided documentation on my Tidbits page.
- 4/26-5/10/2005: Shared about using Style Sheets for web development, information available at http://educ.jmu.edu/~johns2ja/Tidbits.htm
- 4/12-4/26/2005: Continuing to update Tidbits page with cut-and-paste HTML and Scripting for Web Development.
- 3/29-4/12/2005: Completed update of Tidbits page for use with web development.
- 3/15-3/29/2005: Updated Tidbits page to include additional scripts that may be of use.
- 3/1-3/15/2005:BIRTH!
- Learning more about web scripting - continually developing a "Tidbits" page that has copy-and-paste scripting and html to be used for web development.
- Completed first "live" version of "Tidbits" page with copy-and-paste scripting and html to be used for web development. See http://educ.jmu.edu/~johns2ja/Tidbits.htm
- PRE-DEVELOPMENT
- 2/15-3/1/2005: Authoring and modifying various web pages. Began teaching myself basic JavaScripting for use with linkable graphic images and mouse actions for use in future web development.
- 1/05-1/18/2005:
- Review/use Homesite to edit web pages.
- Shared how to make a webpage in at peregrin.jmu.edu accessible to the web (using chmod and creating a WWW subdirectory) as part of helping assist a user with that issue.
- 12/22/2004-1/4/2005: Converted 14 Knowledge Base posts to HTML.
- BIG PICTURE
- Web Works (1996-present)
- Created the twenty-eighth version of my Tidbits page, adding significant content to the draggable images section and making it also include draggable content where a user can actually re-position tables, text, images, or anything else that can be placed in a
 | Tidbits! (JavaScript, HTML, and more)version 1010000 Also check tech.beacondeacon.com for some of my more current tech pondering and articles. |
SSI |
Requires |
NOTE: This example uses align="center", which is deprecated in HTML5. Please take a look at the HTML5 section to see acceptable ways to align content.
NOTE: This example uses attributes which are deprecated in HTML5. Please take a look at the HTML5 section to handle table borders, padding, and layout.
Here's an example of a template using SSI:
Notice the use of relative path instead of the full URL in the SSI statements. There are other uses of SSI, depending on server configuration. You may want to use include file instead of include virtual. Also visit HTTP Referer, Dates, Last Modified using SSI.
NOTE: To use SSI, you will have to enable it on Apache Server in the .htaccess file. In the .htaccess code below, it allows .html files to be included:
AddType text/html .html
AddHandler server-parsed .html
Options Indexes FollowSymLinks Includes
Learn more about .htaccess files in regards to securing a site via authentication and redirects.
Here are some links for more advanced SSI use:
- http://www.mimas.ac.uk/~zzaascs/ssi/ssi1.shtml
- http://www.georgedillon.com/web/ssivar.shtml
- Archive of http://www.explainth.at/en/ssi/sconf.shtml
 Back to Menu
Disabling the Right Click Menu |
If you are using Internet Explorer, you can disable the right click menu and get the message "Jamie Johnson was here!" instead of the Quick Menu.
This is accomplished with the following script (of course you can change the message):
Now look at the code below. It disables right-clicking in both Gecko and Internet Explorer browsers, including Firefox. On a Mac, if using such a browser, this will also disable the CTRL-Click (control click) of a single-button mouse. Here is the code from CodeLifter.com:
Finally, look at this code below. It disables right-clicking for IE-rendering, Gecko-rendering, and Safari browsers!
Back to Menu
Some HTML Buttons To Test |
|
Accomplished with the following: |
|
Accomplished with the following: |
|
Accomplished with the following: |
|
Accomplished with the following: |
|
|
Back to Menu
Swapping Linkable Pictures based on Mouse Action |
Drag the mouse on and off this picture:

This is accomplished with the following script:
NOTE that if you use 5 images, the nomenclature must follow m1 through m5 in the above tags. Also note that you can expand what can occur with mouse actions and linkable images by using onMouseDown to determine an action when the user clicks on an image. Also note that since the scripting uses functions, you could do something else based on mouse action, not necessarily graphical swapping (such as displaying text or displaying text after a certain number of clicks, etc.). The practicality of swapping images would be something like words changing color or appearing highlighted when the mouse is over them or clicked on them, etc.
Now let's simplify the process. As you see, with JavaScript enabled, as you drag the mouse over the image below, it swaps with a new image:
This takes much less code and accomplishes the same thing. Be careful of the name/id so that you can identify which img src to affect. The image does not have to be linkable. The code to accomplish this more simply is as follows:
Pre-loading Images
Note: Sometimes, it is a good idea to preload images when you swap them, but usually in cases where you find you will be using the picture repeatedly. The example below is not necessarily the best use of pre-loading, but it shows how it is accomplished with this coding below (Pay particular attention to the id or name items so you can see how the HTML and JavaScript interact:
Back to Menu
Redirecting |
In the HEAD of the HTML document, include the following:
and in the body include something like the following if you desire:
This page has been moved to <a href="http://educ.jmu.edu/~johns2ja">http://educ.jmu.edu/~johns2ja</a>
This will direct the person from the current page to http://educ.jmu.edu/~johns2ja.
Take special note that after content, I have a 0 for 0 seconds. If you want the screen to wait 5 seconds, put a 5.
Of course you can use JavaScript and use something like the following to do the same thing:
| Requires |
Another use that requires no scripting and is even more effective than the meta tag is using .htaccess: |
This will redirect SW/ to Tidbits.htm. This is then saved in a file called .htaccess and placed in the directory that you want to redirect (in this case SW). You could specify .* after the /SW/ to specify all files are redirected. UPDATE: doing /johns2ja/SW/ will redirect everything in that directory to the new location. If you want to redirect just the index page, you do RedirectMatch /SW/index.htm /johns2ja/Tidbits/index.htm. Also, you don't have to redirect to the same server. The Tidbits destination could be any web URL.
If you have 2 parallel sites and you want to redirect from each file on the old site to each corresponding file on the new site, then use the code below. For example, say you have a site http://www.myserver.com/mysite/ and you have copied the files from there to the new URL http://www.myserver.com/mynewsite/ and further, let's say, you want each individual file in the mysite version to redirect to the corresponding file in the mynewsite version. Here's how to do it (just a little RegEx) in your .htaccess file:
Note the above code assumes you are redirecting .html files to .html files and are on the same server. The code is not limited to that instance. You could redirect a .docx file or .pdf file. For example, redirect from myfile.pdf to a web page:
RedirectMatch /mydirectory/myfile(.*)\.pdf http://www.mydomain.com/mydirectory/index.html
If you want to redirect to a 404 page when a page is not found, use the following:
ErrorDocument 404 /404.html
In the example above, 404.html would be the file name and it would be in the root (/) directory. You can use different paths or URLs.
For more information about .htaccess files, please click here.
And if you want to use Perl/CGI to redirect, you can this way (and have form or something launch the script):
However, that above example requires reprinting the header. If you do not want to do that, here is another alternative using Perl/CGI:
To get more information about Perl/CGI, please visit my Perl site.
Back to Menu
Sending E-mail with JavaScript |
The following HTML and JavaScript does more than just send an e-mail. What it does is it accepts input from the user and either adds that input to the predetermined format of the message or simply sends the predetermined message. Any part of the e-mail can be based on input or can be pre-configured. Look at the last line of code below. This is what really handles the e-mail. Really all the script does is determine data or receive input from the user. If you do not want the body to be included in the formatting, simply take the &body part out of the tag of the last line of code. All of this is accomplished with the following code:
If you want to include returns, tabs, or other special "characters" in the e-mail text, you can use these URL-encoding references:
| horizontal tab | %09 |
| line feed | %0A |
| vertical tab | %0B |
| form feed | %0C |
| carriage return | %0D |
HOT TIP!!! Notice that this code uses body onload. There is also an onunload. For example:
<body onunload="javascript:alert('Come back and visit again!');">
Also note the powerful potential uses of such code. This code will execute when someone leaves the page.
Back to Menu
The Amazing Clock |
Try the script below in a blank HTML document using Internet Explorer ONLY to see an amazing clock. If you are currently using Internet Explorer, it will be like the one at Jamie's Quick Links, except that it will follow the mouse anywhere on the screen. Note the /* marked lines */, however.--> In playing with and manipulating the script, I discovered that the clock is on an x-y axis. If you replace the formulae of the /* marked lines */ with constants, the clock will be fixed in position on a screen as it is currently (for Internet Explorer users). If you leave the formula for xmouse and make the ymouse value a constant, then the clock will follow the mouse horizontally, but not vertically on the screen. If you leave the formula for ymouse and make the xmouse value a constant, then the clock will follow the mouse vertically on the screen, but not horizontally.
If you enjoy clocks, also see Simple Clock, Analog Clock or JavaFX Clock or see this clock and those all together on my Clocks! page.
Back to Menu
Analog Clock using Flash |
with thanks to Mandomartis Advanced Effect Maker...
The following uses just a file and a small bit of code:
You don't have Flash installed. Install Flash. Like this output? See a script to detect if Flash is installed.
Please copy and paste the HTML tags below to your HTML editor or to your web page. It is important that you copy it completely without leaving out any HTML code. Don't forget to copy include the file analogclock1.swf in your web server so that the effect works properly. It should be placed in the exact same location as the HTML file in which you paste these HTML tags. This HTML page is saved into your working folder C:\Program Files\Mandomartis\Advanced Effect Maker\projects\, but you don't need to include it in your server. You can always open it to get the tags again. |
If you enjoy clocks, also see The Amazing Clock, Simple Clock or JavaFX Clock or see this clock and those all together on my Clocks! page.
Back to Menu
Simple Clock |
In order to put a small box with a digital clock within it, add the following to an HTML document:
The <body> tag should look like this:
<body onload="simpleClock();" onunload="stop();">
Then add this script:
Then put the following in the document:
<form id="sclock" name="sclock">
<input type="text" name="stime" size="13" />
</form>
If you enjoy clocks, also see The Amazing Clock, Analog Clock or JavaFX Clock or see this clock and those all together on my Clocks! page.
Back to Menu
Scrolling Text |
To make text scroll, use the following, but note that this would be better suited for its own page or frame. If it were enabled here, it would disrupt this page. Also note that if the screen fully encompasses the message, no scrolling will occur. Take a look at the line if (curPos > 2000). This controls the time and when the scrolling resets. Try this in a BLANK HTML document:
The Script:
Back to Menu
Formatting Links |
How did I get my links, including the internal ones (anchor links), to remain blue and only turn gray when the mouse is over them? How did I get the underlining of the links to go away unless the mouse goes over them? This is formatting links. I just put the following code between the <head> and the </head> tags:
Also see Cascading Style Sheets (CSS) as this is an example of using a Style Sheet.
Back to Menu
Prompting in JavaScript |
NOTE: This example uses align="center", which is deprecated in HTML5. Please take a look at the HTML5 section to see acceptable ways to align content.
Here's a script that may be useful when customized. It asks the user to enter information and then provides that information back either as text on the page or as an alert if the user so desires. This script prompts the user for his or her favorite university and then alerts him or her and then writes it on the document. If no response is given, then JMU is the default. The following code will accomplish this:
Note: You see the use of prompt and alert above and note their differences when you implement them. There is a third option, which is confirm. Confirm is much like alert, but allows the option to cancel.
Back to Menu
Confirming Going to a Page |
The following script and HTML allows for someone to click on a button to go to a page, but also to cancel out if desired (The destination page is JMU Computing and the cancellation page is this page, though it can be changed as well):
Back to Menu
Draggable Images and Content |
Drag the image below wherever you want it...

This is accomplished with the following:
Look at the table and image below and drag them (even the table!): [Newer browsers do not support these!]
Howdy!Lego Star Wars |

This is more sophisticated than the above example. In the prior example, the first listed draggable element cannot go on top of another element after it. In this example, not only can draggable elements go on top of one another regardless of order, but anything can be draggable as you can see with the table. Also, you do not have to keep track of the number of elements as a concern of variable name. You simply use the dragableElement class for any draggable element. Text, tables, images, or anything that can go in a <div> tag can be dragged using this method. And any element can be linkable, too! For more information on this latter example and the script, please visit http://www.dhtmlgoodies.com.
Now how is this latter example accomplished? See the following below (It is recommended the script portion go in the HEAD section and the rest in the BODY section):
The key to this working is to place the following around the element to be made draggable: <div class="dragableElement">, then the coding, text, table, or graphic, and then <div>.
Back to Menu
Opening and Closing a Window |
Sometimes it is nice to have a small window open up (sometimes it isn't). A wonderful website describing this can be found at http://www.pageresource.com/jscript/jwinopen.htm, but I will provide a simple example here.
This is accomplished with the following HTML:
The same action as the button can be accomplished with a mere link:
Click for new window
Accomplished by the following HTML:
Here's even a more effective method with the link (since this version assesses whether or not JavaScript is disabled and allows for functionality even if disabled):
Click for new window
Accomplished by the following HTML/JavaScript:
Note all the parameters that can be controlled with the new window such as location being revealed, scrollbars, menubar, toolbar, size, etc. If you don't care about controls, you can simply use a target="_blank" within the link tag to do the same thing. Note also that I used href="#openwindow" to return to this section of this page.
Back to Menu
Faded Images & Text |
NOTE: This example uses align="center", which is deprecated in HTML5. Please take a look at the HTML5 section to see acceptable ways to align content.
Here's the original image:
Here's the faded image:
This is accomplished with just one line in HTML:
NOTE: The opacity number is what determines how faded something is. If the opacity is 100% (IE = 100, Others = 1.0), then the image will not appear faded at all. If it is 50% (IE = 50, Others = 0.5), then it will appear less faded than the image set to an opacity of 10% (IE = 10, Others = 0.1). This works across browsers for images.
What about text?
The above CSS does not work for text across browsers. Standards-compliant browsers require no additional CSS for text opacity. However, for Internet Explorer, if you are applying opacity to text, you need to add the following CSS: zoom: 1;
The following should work cross-browser:
faded yellow
Here's the code:
Back to Menu
Sample DOS Script written in 1997
Here's a bit of history . . .
(note the rem statements preceding the lines that copy to lpt1. If rem is removed, then the report
prints off LPT1.)
Back to Menu
Cascading Style Sheets (CSS) |
*** If you are interested in making CSS properties apply only in IE, you can simply put an asterisk in front of it like so:
*font-size: 25px;
Visit Using CSS to check for IE to see a practical use of this "star masking."
General
Look at the text below. It uses no <i> tag. It has an aqua background. This is accomplished using Style Sheets. In fact the Formatting Links and Hovering Text sections of this page use style sheets.
A Jamie's Quick Links page
This is accomplished with the following style sheet and subsequent HTML which uses a <span> tag:
Dynamic Links
The power of Style Sheets: Another Example. If you paste the following code into an HTML document, you make links in general appear blue when active and blue when visited and not underlined whether active or visited. When hovering over a general link, an underline appears and the link turns gray. Further, h1 header will remain blue no matter what and the text is centered. An h2 header will be black when active or visited and red when hovering over it. Those links in the "greenorange" section will be green when active and orange when visited. Looking at the code, can you see how this is done? Note the use of ".greenorange" with <div class="greenorange"> in the coding below (Create a new HTML document using this code to try it out!):
Full Stylesheet Example
Also note some of the other features you can control in style sheets, such as fonts, different sections, etc., as shown below:
Background Colors
Another neat, but simple feature that does not require JavaScript is to apply background colors on a link when one hovers the mouse over it. The following code will make a link aqua and give it a solid underline even when the color is applied during hovering. If you take out the border-bottom line then there is no border on the bottom.
height and width
Here is an example of how you would control the height and width of a division element using CSS:
div {
	height: 150px;
	width:  250px;
}
You can also use max-height to control maximum height, min-height to control minimum height, max-width to control maximum width and min-width to control minimum width.
border and outline
Borders are on the edge of an element and can be controlled by CSS. Typical usage for border:
border: 1px solid #450084;
Other border properties: border-bottom,
border-bottom-color, border-bottom-style, border-bottom-width, border-color, border-left, border-left-color, border-left-style, border-left-width, border-right, border-right-color, border-right-style
border-right-width, border-style (dotted, dashed, solid, double, groove, ridge, inset, outset and you can specify different styles for top right bottom left), border-top, border-top-color, border-top-style, border-top-width and border-width.
Outline is outside the border of an element (and not supported by IE8 and below). Usage:
outline: black dotted thick;
Other outline properties: outline-color, outline-style (dotted, dashed, solid, double, groove, ridge, inset and outset), outline-width (thin, medium, thick or using actual values such as pixels).
Here's an example of border, outline and then both:
- A yellow border around an image:

CSS code used:border: 10px solid yellow;
- A red outline around an image, not much different by itself besides color:
CSS code used:outline: red solid thick;
- A yellow border AND a red outline around an image:
CSS code used:border: 10px solid yellow; outline: red solid thick;
Internal and In-line Styling Using Span
What if you want to use a style sheet or styling within a phrase or paragraph without breaking the paragraph up as happens with tags like <p>, <div>, or <h1>, etc. Look at the following examples below:
My favorite color is blue.
I really enjoyed the book The Lion, the Witch, and the Wardrobe by C.S. Lewis.
The above example underlines and makes a word blue using the following code:
This can also be done by simply embedding styles within the HTML:
My favorite color is blue.
I really enjoyed the book The Lion, the Witch, and the Wardrobe by C.S. Lewis.
This does the same thing as the prior example with less coding as shown by the code used to do it below:
Thumbnails, Floating, and Tabular Emulation
Take a look at the following coding:
This coding allows CSS to emulate tables. FLOAT allows DIV objects to be side-by-side and affects alignment. CLEAR allows DIV objects to be forced to a new line. MARGIN numbers follow top, right, bottom, left, as does padding. Also take notice of how you can use a URL or image file or color for the background in CSS. You can also control the size of the DIV. You can modify the coding above to create a nice page layout without even creating a table.
Use of id over class
Another good use of floating is shown below. Further, below points out how instead of using class=, you can use id= (conventionally, class is more global in use while id is used for specific elements and each id must be unique). The way this is done is that in the Style sheet, a class is designtated by a period followed by a name, while an id is a # followed by the name. Note how id is used similarly to class below:
COUPON
50¢ for 2 bars
COUPON
75¢ for 2 yogurts
Kouponi
12 mpiskota €1,00
This is accomplished with the following code:
You can also use the id= feature by using a "container" to striclty use CSS to CENTER as shown in the example below:
Now use <div id="container"> to put it into action.
Font Weight and Background Image
Another use with Style Sheets is font weight. You can accomplish this with font-weight:bold; or font-weight:normal; and this could be useful such as when you want your links to become bold when a user hovers over them.
You can control a page's background image using Style Sheets such as with the following example where you place a containing div as the immediate child element of the body:
The property background-position can use the following values: left top, left center, left bottom, right top, right center, right bottom, center top, center center, center bottom (one word like bottom also assumes center), x% y% (25% 50%), and xpos ypos (5px 5px). If I want to repeat a background image horizontally (x-axis) or vertically (y-axis), I use background-repeat: repeat-x; and background-repeat: repeat-x; respectively.
Displays: inline versus block
Another item that can be used in CSS is using display: to control whether something is shown inline (such as within a line such as with defaults of <br /> or <strong>) or block (such as with defaults of <div>, <table>, <p>, lists, and headers where a new line precedes and follows such elements).
This is accomplished with the following code when embedded in <style> tags(for example):
Note that such coding actually reverses the defaults (the ones made inline are block by default and vice versa!). You can see a good use of display at Hover Menus.
To see how display can be used to hide and show in drop-down fashion, please refer to the last example in the Hiding Text section.
Indentation, First Letter, First Line, and Pseudo-classes
Take notice of the next couple of paragraphs:
This paragraph is indented. Also, the first line will be blue and caps, and the rest of the lines will be as such, too.
You will notice that these same features are present when a second paragraph is generated as well.
This is made possible by the following stylesheet and code:
Something else to notice: first-line and first-letter appear after a colon (:) and are pseudo-objects, similar to pseudo-classes, which follow this syntax: selector:pseudo-class {property value}.
A useful pseudo-class is first-child, which refers to the first element. You have used pseudo-classes before like link, visited, hover, and active follow a.
Speaking of these pseudo-classes, they should come in this order:
a:link
a:visited
a:hover
a:active
in order to work across browsers. Just remember LVHA. Some say, "LoVe HAte" or as I say, "LiVe HAppy!"
Be careful to note that pseudo-classes are not case-sensitive. The lang pseudo-class doesn't work in Internet Explorer (Make sure to test!). Also in Internet Explorer, it is encouraged that you have a DOCTYPE declared (Not a bad idea for any browser if you want to be standards-compliant).
CSS2 Media: screen and print
If you want to make what is on the screen versus what comes off the printer appear differently, try this code:
If you want to prevent printing of certain elements, you can use the following (where element is some selector):
For information about screen resoultions, you may want to see the Screen Resolution section.
Overflow, Visibility, and Hiding
Overflow and visibility are other nice CSS features. Overflow is used to save space on a page. If you have a div that has a height of 150px but the information within it is 700px high, then overflow may be a nice option (and a textarea alternative). Here's an example:
This is an overflowing div.
This is an overflowing div.
This is an overflowing div.
This is an overflowing div.
This is an overflowing div.
This is an overflowing div.
This is an overflowing div.
This is an overflowing div.
This is an overflowing div.
This is an overflowing div.
This is an overflowing div.
This is an overflowing div.
This is an overflowing div.
This is an overflowing div.
This is an overflowing div.
This is an overflowing div.
This is an overflowing div.
This is an overflowing div.
This is an overflowing div.
This is an overflowing div.
This is an overflowing div.
This is an overflowing div.
This is an overflowing div.
This is an overflowing div.
This is an overflowing div.
This is an overflowing div.
This is an overflowing div.
This is an overflowing div.
This is an overflowing div.
This is an overflowing div.
This is an overflowing div.
The coding for the CSS is simple: div.idonthavethepower { height:150px;width:300px;border:1px solid black;overflow:auto; }
One can use scroll and hidden instead of auto as well. According to https://speakerdeck.com/stopsatgreen/the-css-of-tomorrow-revised, the future may hold the following as possiblities in CSS3:
E { overflow-x: pages; }

F { overflow: fragments; }
F::nth-fragment(odd) {}
Speaking of hidden, there is amazingly simple, yet powerful, CSS coding that allows objects to disappear and appear. I often use JavaScript to make certain items appear or disappear. This is accomplished using visibility:hidden or visibility:visible. Since it is a style, you can alter it using JavaScript. Look at the following example:

The code:
z-index, Absolute/Relative Positioning, and Hover Menus
Information about z-index and absolute/relative positioning
Comments
And you can put comments in Style Sheets. You open a comment with /* and close it with */.
(Note: the /* comment */ in stylesheets is good for a multiple-line comment in JavaScript.)
Neat Examples
To see dynamic CSS in action, go see the Dynamic CSS Highlighter section.
I've come up with a way to swap images with CSS ONLY - NO JAVASCRIPT!Linking an External Stylesheet and Changing Stylesheets
FINALLY:
Use the following code in the <HEAD> section of an HTML document to refer to a
style sheet that is in another file as opposed to being coded within the HTML document
(This is useful if you have multiple pages using the same style):
This can also be used to change stylesheets using JavaScript. In the above link tag, add
id="stylesheet2change"and then you can use the following JavaScript function to change the stylesheet dynamically:
Spacing, Text Transformation and Text Decoration
This has the line-height:200% applied.
See what I mean?
For line-height, you can use normal, number (multiply current font-size by this factor), length (e.g., 25px between lines), or percentage.
See what I mean?
For line-height, you can use normal, number (multiply current font-size by this factor), length (e.g., 25px between lines), or percentage.
This line uses 12px letter spacing using letter-spacing:12px.
This line uses -1px letter spacing using the same method, but a negative value.
These words are far apart and don't like each other because they use word-spacing:25px.
These words are close together and like eachother. They are hard to read because they use
word-spacing:-1px.
word-spacing:-1px.
This does not have the line-height, letter-spacing, or word-spacing applied.
See what I mean?
See what I mean?
I typed all of the next item in lower-case letters, but they appear uppercase. It uses text-transform:uppercase to accomplish this:
this was all typed in lower-case letters.
And you can reverse it with text-transform:lowercase:
THIS WAS ALL TYPED IN UPPER-CASE LETTERS.
With book titles you can be lazy by using the text-transform:capitalize method, where the first letter of each word is capitalize. Essentially, you can type all lower-case letters the green letters and have it come out looking like book title:
the green letters
Probably with links, you have seen text-decoration to either underline or not underline a link. However, there are more uses of this property. Using text-decoration:overline puts a line above the text, such as when you are explaining that a decimal repeats like this: 0.777. You can also replace the deprecated strike tag with text-decoration:line-through value: OMIT.
Many of these properties use hyphens in them. The rule if you refer to them in JavaScript is to remove the hypen and capitalize the first letter after the hyphen like this: textDecoration.
The style sheet used to accomplish the above coding in this section is as follows:
CSS Rounded Corners
(no images required!)Sometimes, folks want to get away from the "square" look of CSS menus, but do not want to
rely on the maintenance and space of images to do so. There is a way to accomplish rounded corners in
CSS without images! Consider the examples below (Note: The code from this section is from
September 20, 2007, archive of http://blog.yosle.com/2007/09/20/css-round-corners/):
General Rounded Corner
Round FILL!!
Rounded Borders
Round Border!!
With a Header Section
Here is your Header!
Look ma, no images!
CSS3 offers a more streamlined way to accomplish the rounded borders for those browsers that are compatible.
CSS3
Menu:- Rounded Borders
- Multiple Backgrounds
- Re-sized Backgrounds
- Text Shadowing
- Word-Wrap
- Outline
- Resize
- Attribute Selectors
- :not Selector
- Gradients
- Media Queries and Viewport
- Relative em
- Pseudo-Classes
- Hierarchies/Descendants/Siblings
- Transform
- Keyframes and Animation
- Org Chart using box-shadow and border-radius
Not all browsers support it, but I have put CSS3 code in the various examples below. I will narrate what one should see so you can determine if your browser is compatible.
Rounded Borders
Below, you should see an area that is blue with rounded corners if your browser is compatible with rounded borders.
.rounded { background-color: blue; color: #f1f1f1; -moz-border-radius: 15px; border-radius: 15px; }
If your browser is not compatible, you may want to consider using another method for rounded borders in CSS.
Multiple Backgrounds
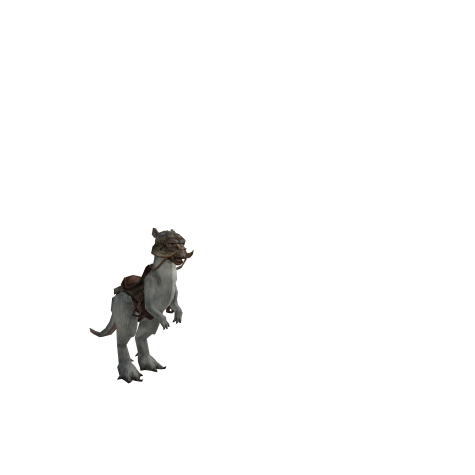
These two images, in this order, are used as together as the background if your browser is compatible with multiple backgrounds (Take special notice of the size of the images, namely the Tauntaun. I have outlined the images so you can tell):

Now to the actual multiple backgrounds in effect:
This text is within a div that uses a class that is styled to have 2 backgrounds, the Hoth scene and the Tauntaun.
Re-sized Backgrounds
Now, let's use the above multiple backgrounds, but re-size them.
This uses background-size: 200px;
This uses background-size: 200px 100px;
This uses background-size: 200px 100px, 400px 200px;
This uses background-size: auto 200px;
This uses background-size: 50% 25%;
This uses background-size: contain;
This uses background-size: cover;
Text-Shadowing
If your browser is compatible with text-shadowing, you should see text that has an orange shadow almost as if the letters are on fire.
This center-aligned white text is using text-shadow: 2px 2px 2px orange; on a black background.
Word-Wrap
Here is a box that is 100 pixels wide:
Below is a box that should be 100 pixels wide with the following text inside of it:
The quick brown fox jumped over the lazy sleeping dog. And a very long word is antidisestablishmentarianism.
The quick brown fox jumped over the lazy sleeping dog. And a very long word is antidisestablishmentarianism.
Notice that the long word either pops out of the box or the box is extended beyond 100 pixels. Well, if your browser is compatible with word-wrap, then word-wrap: break-word; fixes the problem by wrapping the long word and keeping it in the box:
The quick brown fox jumped over the lazy sleeping dog. And a very long word is antidisestablishmentarianism.
Outline
How about an outline?
Take this image with a black border around it and a margin of 25 pixels:

Now, add this style to it: outline-offset: 12px; outline: 5px solid red; and if your browser is compatible with outlining, then you will see the bordered image with a red outline around it, but 12 pixels away from the edge.
Note: Be careful with the offset as it can go off the page in some browsers or run into neighboring text (There's a reason why I added the 25 pixel margin).
Resize
This is one of my favorites! You can resize the following 3 boxes if your browser is compatible with resizing:
Resize vertically and horizontally:
div.resizeBoth {
width: 100px;
height: 100px;
border: 1px solid;
resize: both;
overflow: auto;
}
Resize horizontally:
div.resizeHorizontal {
width: 100px;
height: 100px;
border: 1px solid;
resize: horizontal;
overflow: auto;
}
Resize vertically:
div.resizeVertical {
width: 100px;
height: 100px;
border: 1px solid;
resize: vertical;
overflow: auto;
}
There is also the box-sizing property in CSS3, supported by all modern browsers, and is described at http://www.w3schools.com/cssref/css3_pr_box-sizing.asp.
Attribute Selectors
Almost like using RegEx in CSS, attribute selectors allow one to match parts of a title's string and apply styles if the browser is compatible with attribute selectors.
This CSS says that a paragraph with a title that begins with "pyr" will have text that is maroon with a golden background, if your browser supports attribute selectors in CSS3:
p[title^="pyr"] {background: #ccc999; color: maroon;}
Been to Egypt?
<p title="pyramid">Been to Egypt?</p> satisfies the rule, if your browser supports attribute selectors in CSS3.This paragraph has a title of "home" and so does not satisfy the rule; i.e., no maroon text or golden background.
This paragraph has a title of "pyrotechnics", which satisfies the rule, which will show maroon text on golden background if your browser is compatible with attribute selectors in CSS3.
This CSS says that a paragraph with a title that ends with "ide" will have text that is blue with an aqua background, if your browser supports attribute selectors in CSS3:
p[title$="ide"] {background: aqua; color: blue; }
A paragraph with a title of "glide" meets the criterion of the rule, which means it will have blue text and an aqua background, if your browser supports attribute selectors in CSS3.
This paragraph has a title of "home" and so does not satisfy the rule; i.e., no maroon text or golden background.
A paragraph with a title of "side" satisfies the rule, if your browser supports attribute selectors in CSS3.
This CSS says that a paragraph with a title that has anywhere within it the substring "hari" will have text that is blue with an aqua background:
p[title*="hari"] { background: navy; color: white; }
This paragraph should have a navy background and white text since it satisfies the rule with the title "charisma", if your browser supports attribute selectors in CSS3.
This paragraph does not satisfy the rule with the title "harrisburg" since there is one r too many.
This paragraph with the title "eucharisto" satisfies the rule, if your browser supports attribute selectors in CSS3.
Resource: http://www.css3.info/
One can specialize selectors further with rules like these:
*:matches(ol,ul,p) span {}
*:not(ul) span {}  (also see below)
Based on the source at https://speakerdeck.com/stopsatgreen/the-css-of-tomorrow-revised.
:not Selector
div :not(#intro) { /* styles all children in div except #intro */ }

div :not([disabled]) { /* styles all children in div except those with a disabled attribute */ }

div :not([id="b"]) { /* styles all children in div except those with an id attribute with value of "b" */ }
Cannot put in compounds or pseudo-elements like :first-line (which is a pseudo-element as opposed to a pseudo-class like :first-child, which is allowed)
div:not(#intro) looks for a div without an id of intro as opposed to the first example where it looks for the #intro child of the div.
li:not(:first-child):not(:last-child) { /* styles any li, but not the first-child or last-child */}
SOURCE: http://www.sitepoint.com/css3-video-tutorial-not-selector/
Gradients
Take a look at the gradient backgrounds below where I am using #FFFFFF (white) to #C9B06E (gold), with offset start at 0% and offset end at 90%:
To Bottom
.gradientTopToBottom
.gradientTopToBottom
To Bottom Right
.gradientToBottomRight
.gradientToBottomRight
To Bottom Left
.gradientToBottomLeft
.gradientToBottomLeft
To Right
.gradientToRight
.gradientToRight
To Left
.gradientToLeft
.gradientToLeft
To Top Right
.gradientToTopRight
.gradientToTopRight
To Top
.gradientToTop
.gradientToTop
To Top Left
.gradientToTopLeft
.gradientToTopLeft
Here's the code for the different classes:
.gradientTopToBottom {
	/* IE10 Consumer Preview */
	background: -ms-linear-gradient(top, #FFFFFF 0%, #C9B06E 90%);

	/* Mozilla Firefox */
	background: -moz-linear-gradient(top, #FFFFFF 0%, #C9B06E 90%);

	/* Opera */
	background: -o-linear-gradient(top, #FFFFFF 0%, #C9B06E 90%);

	/* Webkit (Safari/Chrome 10) */
	background: -webkit-gradient(linear, left top, left bottom, color-stop(0, #FFFFFF), color-stop(0.9, #C9B06E));

	/* Webkit (Chrome 11+) */
	background: -webkit-linear-gradient(top, #FFFFFF 0%, #C9B06E 90%);

	/* W3C Markup, IE10 Release Preview */
	background: linear-gradient(to bottom, #FFFFFF 0%, #C9B06E 90%);
}

.gradientToBottomRight {
	/* Note: This gradient may render differently in browsers that don't support the unprefixed gradient syntax */

	/* IE10 Consumer Preview */
	background-image: -ms-linear-gradient(top left, #FFFFFF 0%, #C9B06E 90%);

	/* Mozilla Firefox */
	background-image: -moz-linear-gradient(top left, #FFFFFF 0%, #C9B06E 90%);

	/* Opera */
	background-image: -o-linear-gradient(top left, #FFFFFF 0%, #C9B06E 90%);

	/* Webkit (Safari/Chrome 10) */
	background-image: -webkit-gradient(linear, left top, right bottom, color-stop(0, #FFFFFF), color-stop(0.9, #C9B06E));

	/* Webkit (Chrome 11+) */
	background-image: -webkit-linear-gradient(top left, #FFFFFF 0%, #C9B06E 90%);

	/* W3C Markup, IE10 Release Preview */
	background-image: linear-gradient(to bottom right, #FFFFFF 0%, #C9B06E 90%);
}

.gradientToBottomLeft {
	/* Note: This gradient may render differently in browsers that don't support the unprefixed gradient syntax */

	/* IE10 Consumer Preview */
	background-image: -ms-linear-gradient(top right, #FFFFFF 0%, #C9B06E 90%);

	/* Mozilla Firefox */
	background-image: -moz-linear-gradient(top right, #FFFFFF 0%, #C9B06E 90%);

	/* Opera */
	background-image: -o-linear-gradient(top right, #FFFFFF 0%, #C9B06E 90%);

	/* Webkit (Safari/Chrome 10) */
	background-image: -webkit-gradient(linear, right top, left bottom, color-stop(0, #FFFFFF), color-stop(0.9, #C9B06E));

	/* Webkit (Chrome 11+) */
	background-image: -webkit-linear-gradient(top right, #FFFFFF 0%, #C9B06E 90%);

	/* W3C Markup, IE10 Release Preview */
	background-image: linear-gradient(to bottom left, #FFFFFF 0%, #C9B06E 90%);
}

.gradientToRight {
	/* IE10 Consumer Preview */
	background-image: -ms-linear-gradient(left, #FFFFFF 0%, #C9B06E 90%);

	/* Mozilla Firefox */
	background-image: -moz-linear-gradient(left, #FFFFFF 0%, #C9B06E 90%);

	/* Opera */
	background-image: -o-linear-gradient(left, #FFFFFF 0%, #C9B06E 90%);

	/* Webkit (Safari/Chrome 10) */
	background-image: -webkit-gradient(linear, left top, right top, color-stop(0, #FFFFFF), color-stop(0.9, #C9B06E));

	/* Webkit (Chrome 11+) */
	background-image: -webkit-linear-gradient(left, #FFFFFF 0%, #C9B06E 90%);

	/* W3C Markup, IE10 Release Preview */
	background-image: linear-gradient(to right, #FFFFFF 0%, #C9B06E 90%);
}

.gradientToLeft {
	/* IE10 Consumer Preview */
	background-image: -ms-linear-gradient(right, #FFFFFF 0%, #C9B06E 90%);

	/* Mozilla Firefox */
	background-image: -moz-linear-gradient(right, #FFFFFF 0%, #C9B06E 90%);

	/* Opera */
	background-image: -o-linear-gradient(right, #FFFFFF 0%, #C9B06E 90%);

	/* Webkit (Safari/Chrome 10) */
	background-image: -webkit-gradient(linear, right top, left top, color-stop(0, #FFFFFF), color-stop(0.9, #C9B06E));

	/* Webkit (Chrome 11+) */
	background-image: -webkit-linear-gradient(right, #FFFFFF 0%, #C9B06E 90%);

	/* W3C Markup, IE10 Release Preview */
	background-image: linear-gradient(to left, #FFFFFF 0%, #C9B06E 90%);
}

.gradientToTopRight {
	/* Note: This gradient may render differently in browsers that don't support the unprefixed gradient syntax */

	/* IE10 Consumer Preview */
	background-image: -ms-linear-gradient(bottom left, #FFFFFF 0%, #C9B06E 90%);

	/* Mozilla Firefox */
	background-image: -moz-linear-gradient(bottom left, #FFFFFF 0%, #C9B06E 90%);

	/* Opera */
	background-image: -o-linear-gradient(bottom left, #FFFFFF 0%, #C9B06E 90%);

	/* Webkit (Safari/Chrome 10) */
	background-image: -webkit-gradient(linear, left bottom, right top, color-stop(0, #FFFFFF), color-stop(0.9, #C9B06E));

	/* Webkit (Chrome 11+) */
	background-image: -webkit-linear-gradient(bottom left, #FFFFFF 0%, #C9B06E 90%);

	/* W3C Markup, IE10 Release Preview */
	background-image: linear-gradient(to top right, #FFFFFF 0%, #C9B06E 90%);
}

.gradientToTop {
	/* IE10 Consumer Preview */
	background-image: -ms-linear-gradient(bottom, #FFFFFF 0%, #C9B06E 90%);

	/* Mozilla Firefox */
	background-image: -moz-linear-gradient(bottom, #FFFFFF 0%, #C9B06E 90%);

	/* Opera */
	background-image: -o-linear-gradient(bottom, #FFFFFF 0%, #C9B06E 90%);

	/* Webkit (Safari/Chrome 10) */
	background-image: -webkit-gradient(linear, left bottom, left top, color-stop(0, #FFFFFF), color-stop(0.9, #C9B06E));

	/* Webkit (Chrome 11+) */
	background-image: -webkit-linear-gradient(bottom, #FFFFFF 0%, #C9B06E 90%);

	/* W3C Markup, IE10 Release Preview */
	background-image: linear-gradient(to top, #FFFFFF 0%, #C9B06E 90%);
}

.gradientToTopLeft {
	/* Note: This gradient may render differently in browsers that don't support the unprefixed gradient syntax */

	/* IE10 Consumer Preview */
	background-image: -ms-linear-gradient(bottom right, #FFFFFF 0%, #C9B06E 90%);

	/* Mozilla Firefox */
	background-image: -moz-linear-gradient(bottom right, #FFFFFF 0%, #C9B06E 90%);

	/* Opera */
	background-image: -o-linear-gradient(bottom right, #FFFFFF 0%, #C9B06E 90%);

	/* Webkit (Safari/Chrome 10) */
	background-image: -webkit-gradient(linear, right bottom, left top, color-stop(0, #FFFFFF), color-stop(0.9, #C9B06E));

	/* Webkit (Chrome 11+) */
	background-image: -webkit-linear-gradient(bottom right, #FFFFFF 0%, #C9B06E 90%);

	/* W3C Markup, IE10 Release Preview */
	background-image: linear-gradient(to top left, #FFFFFF 0%, #C9B06E 90%);
}
Resources:
http://ie.microsoft.com/testdrive/graphics/cssgradientbackgroundmaker/default.html
http://www.colorzilla.com/gradient-editor/
Media Queries and Viewport
A key component of RWD (Responsive Web Design) is the use of CSS3 Media Queries. They are not as complex as they sound. In fact, CSS2 involved media. Here's how one would use media queries for a responsive image at breakpoints of 600 pixels, 480 pixels and 320 pixels for example (where an image with class "mqexample" resizes in a page developed for RWD). Put the following in your stylesheet:
img.mqexample { width: 100%; } /* for all */

@media screen and (max-width: 600px)  {
	img.mqexample { max-width: 525px; }
}
@media screen and (max-width: 480px) {
	img.mqexample { max-width: 420px; }
}
@media screen and (max-width: 320px)  {
	img.mqexample { max-width: 280px; }
}
Then, create markup such as <img class="mqexample" src="someimage.jpg" alt="example image" />
NOTE: To have this be responsive, you need to use the HTML5 DOCTYPE <!DOCTYPE html> and the proper meta tag <meta content="width=device-width, initial-scale=1.0" name="viewport"/> as well. To have a site be truly responsive, you should involve the DOCTYPE, meta tag and some sort of fluid grid structure (bootstrap or YUI, e.g.) and jQuery as needed.
Relative em
You can use calculations to approximate sizes, but it can become cumbersome:
.remdemo1 { font-size: 10px; }
.remdemo1 p { font-size: 1.4em; } /* 14px */
.remdemo1 p span { font-size: 0.8572em; } /* 12px */
Here's a better way if your browser understands relative ems (rem):
.remdemo2 { font-size: 10px; }
.remdemo2 p { font-size: 1.4rem; } /* 14px */
.remdemo2 p span { font-size: 1.2rem; } /* 12px */
Based on the source at https://speakerdeck.com/stopsatgreen/the-css-of-tomorrow-revised.
Pseudo-Classes
CSS3 pseudo-classes worth considering:
	:any-link
	:local-link
Based on the source at https://speakerdeck.com/stopsatgreen/the-css-of-tomorrow-revised.
There is also the nth-of-type pseudo-class selector.
li:nth-of-type(3) { background: red; } /* only the third li would be red */
li:nth-of-type(3n) { background: red; } /* Every third li would be red */
li:nth-of-type(3n+1) { background: red; } /* Every third plus one li would be red and it cycles around */
li:nth-of-type(3n-1) { background: red; } /* Every third minus one li would be red and it cycles around */
li:nth-of-type(even) { background: red; } /* Even li elements are red, but 2n would work, too */
li:nth-of-type(odd) { background: red; } /* Odd li elements are red, but 2n-1 would work, too */
Source: http://www.sitepoint.com/css3-video-tutorial-nth-of-type-selector/
And there is the :empty pseudo-class to style empty elements such as <p></p>
Hierarchies
You can think of direct descendants and siblings when considering hierarchy. For example, if you want to style ONLY direct child li elements of a ul as opposed to all li elements (such as grandchild li elements in nested lists) as in the case of ul li, you do the following:
ul > li { style }
If you want to style paragraph elements that are siblings to an h2 element you do the following:
h2~p { style }
Transform
Look at the code below (Note: I used the bluebox class for all boxes to make them easier to see):
div.bluebox { background-color: blue; color: white; width: 200px; height: 75px; text-align: center; font-weight: bold; margin-left: 1em; }
div.translate{
	transform: translate(20px,20px); /* 20px to the right and 20px down */
}
div.rotate{
	transform: rotate(30deg); /* rotated down 30 degrees */
}
div.scaled{
	transform: scale(2,4); /* 2 times width, 4 times height */
}
div.skewed{
	transform: skew(20deg,10deg); /* 20 degrees x direction, 10 degrees y direction */
}
Original box
transform: translate(20px,20px);
transform: rotate(30deg);
transform: scale(2,4);
transform: skew(20deg,10deg);
And check out this roll link, which uses transform: translate3d and rotateX
Howdy
And there are 3-D transformations, too!
Source: www.sitepoint.com/advanced-css3-2d-and-3d-transform-techniques/
Keyframes and Animation
CSS3 offers keyframes, which make animation simple for modern browsers without the need for scripting. Check out the animation below.
And now our
feature presentation


The animation is handled totally by the CSS via keyframes. First, you write a rule for the element to be animated, giving it a name (I used mymove), duration time (10s is 10 seconds) and you can add infinite if you want it to go incessantly. Then, you write the keyframes rules. With percentages, one can control what occurs throughout the animation. One can also use just 0% and 100% or from and to, respectively, instead. I provide the code below. Take careful notice of the special rules for Safari and Chrome and take note that for Internet Explorer users, you need version 10 or greater. And notice in the code below, I had to do some other "magical" CSS to get the effect I desired, but these are not directly related to animation per se.
There is much more you can do with CSS3 animations. For example, I used animation-delay on particular elements within an animated object to have them do different things at different times such as in my CSS-only Slideshow. For more, check out http://www.w3schools.com/css/css3_animations.asp.
CSS Priority and Precedence
Style sheets follow priority/precedence. The highest precedence is inline styling within an HTML tag using the style attribute. Next, is internal style sheets using the <style> tags in HTML. Then comes the external style sheet which is referenced using a link tag and has a file extension of .css and finally, the browser default. The exceptions to this are the use of !important which prevents overriding such as here:
#myId { color: green !important; }
And then in general within all the above, the later a rule occurs, the higher the precedence. This means that if I have the following:
		#myId { color: green; }
		#myId { color: red; }
Then the color within id="myId" will be red. This is why star masking (using an * to denote IE-based rules) uses rules after other rules. This also applies to link statements within the HTML where subsequently linked .css files take precedence over prior linked files. Often this is done where a template style sheet is linked first followed by a specific content style sheet. This concept is referred to as cascading and is where the C in CSS comes from.
Resource
Excellent resources for Style Sheets are at Archive of http://www.fluffbucket.com/html/style.htm, http://www.cssplay.co.uk/, and http://www.csszengarden.com/.
Chad Kieffer offers an unotrusive way of using JavaScript for controlling styles at http://2tbsp.com/node/91.
Additional CSS Resources can be found here.
Back to Menu
Securing a Web Site (.htaccess) |
Requires |
To secure a website, use .htaccess files (requires Apache/HTTPD). This file goes in the directory you are wanting to secure. A basic .htaccess file looks like the following:
You then want to create an .htpasswd file to put in the same directory. This file contains a list of users and passwords in the following format:
user:encryptedpassword
.htaccess and .htpasswd can be read with a text editor, but you cannot enter straight text as the password since it must be encrypted.
This can be created by using the handy application below. Run the application at a DOS prompt and then upload the file to the same directory as the .htaccess file. Good luck!
Download:
USE:
htpasswd -c: (htpasswd -cb .htpasswd username password) - Creates a new .htpasswd file with an initial user and prompts for a password. After the first use of the -c option if you use -c again you will overwrite the last .htpasswd file.
htpasswd -b: (htpasswd -b .htpasswd username password) - Adds more users/passwords to the .htpasswd file. Instead of prompting for the password you need to enter the password of the username into the command line.
htpasswd -n: (htpasswd -n username) - Prompts you to put in a password then displays it to you in the encrypted form. This function does not update your .htpasswd file.
htpasswd -nb: (htpasswd -nb username password) - Very similar to regular -n but you will add the password to the command line.
Mixing LDAP and non-LDAP users
What if you want to allow persons who authenticate against LDAP but also allow non-LDAP users. If so, you will need to create an .htpasswd file using the program and syntax above, which stores the password in an encrypted state. You will also want to create a file called htpasswd.users that is a text-based file easily created in Unix using the pico command. The htpasswd.users file is simply a list of users -- both the non-LDAP user(s) and LDAP user(s), one per line. It may look something like this:
snow.white
cyaeger
lpasteur
sfreud
hannibal.lecter
luke.skywalker
hsolo
Notice how I have mixed user-ids with different nomenclature. If the flast user-ids are LDAP and the first.last are non-LDAP user-ids, then I will need to create an .htpasswd file for the first.last user-ids that includes uniquely assigned passwords. I could even uniquely assign the user-id for non-LDAP persons, too, if I desired.
Finally, you need to create an .htaccess file for such a combination. It will be different than the one above.
See below:
If you are going against LDAP, you can have require user username to specify a user. You can also do this against the htpasswd.users file and not even allow LDAP users.
Forced SSL/HTTPS
To force https, you put two lines like the following above the lines of code in the textbox above:
SSLRequireSSL
ErrorDocument 403 /fullpath to cgi scripts goes here/https_move.cgi
And then the contents of the CGI/Perl script https_move.cgi are as follows (Thanks to Meg Morris):
Here's an example that shows how to use a different method to force https: and use a generic non-LDAP user (i.e., one that is specified by htpasswd.users like shown above) MYGENERICUSERNAME:
If you wanted an LDAP user, you would leave out the AuthUserFile lines and modify the require line accordingly.
Be very careful with permissions in Unix for all these files, both for functionality and security reasons.
If you are interested in redirecting a page using .htaccess, please click here.
Back to Menu
Mapping on a Web Page |
Mapping is a nice feature when you want to simply allow users to click on a graphical image that is built into the background of the page. It can be used in various ways. It takes some time. For a basic map, you could do something like the following in the body of the HTML document:
There is a lot there to consider. You must have width and height of the image set.
The numbers are important. Note that usemap points to the actual map coding below. "rect"
refers to rectangular shape. To see the size and position of maps after coding, you can
click on the page and use the Tab key. Coords for rect in example (220,330,400,450) means
point one (the upper left point of the rectangle) is in 220 from the left 330 from the top.
Then point two (the diagonal from point one of the rectangle -- the lower right hand point) is 400 from
the left and 450 from the top. The URLs are the destination locations of the mapped areas of the image.
For more advanced mapping, you may want to have sites pop up in a frame, which might use coding like this:
Note that there are specifications in the position of the frame (upper left hand corner with the 0px for left and top), as well as a home page (as shown with the URL) and other features such as the "mf" which is the name matched with the target of the above URLs so that they will display in the window as opposed to opening a new window. A better use of this would not use full-fledged websites to pop up in the window, but they are used as an example.
You can also use different shapes such as poly, which puts points in a clockwise manner.
More information about z-index and absolute positioning
Back to Menu
JavaScript Loop and Alert |
partly |
There are many uses for loops and alerts, definitely more useful than the examples listed below, but the following example will alert the user, seek a prompt, and use a loop to put text all over the screen.
while loop
Start by putting the following in the head of the HTML document:
So looking at the script, one can see that you see the alert for your reminder, then wincount loads and the user sees the alert again and then receives a prompt with a field box. If the user's response is blank, then another alert appears. The user then sees the response to the prompt. Meanwhile, the loop writes "This is your reminder! " 100 times as designated by the loop.
for loop
In the above example, the loop uses a while loop via the following code:
This same thing can be accomplished using a for loop:
Note that i++ is shorthand for i=i+1. The for loop follows this syntax:
for (var initiating variable=value; condition; incrementation or loop generator)
{
code to be executed
}
Have some fun with JavaScript prompting similar to Mad Lib by clicking here.
Back to Menu
Write a file based on prompt in JavaScript |
You can use some of the aforementioned coding to prompt a user for text and then write that text to a file. This is accomplished with the following HTML:
Back to Menu
Synchronized Randomizerby Jamie Johnson |
The Synchronized Randomizer generates a random number itself calculated by ten random numbers. It then displays this
number on the screen, allows the user the option to save it into a file and sends the number in e-mail to the recipient(s)
entered in a prompt. One can cancel the file save and the e-mail if desired. This can be useful if more than one person
needs to share a randomly generated code. The code is different every time and is the e-mail, file, and screen are only
synchronized on the current run. The HTML and JavaScripting used to accomplish this is below (If you are interested in
how to simply generate a random number, click here.):
If you are just wanting to generate a random whole number, use code like the following:
var rndNo=Math.floor(Math.random()*6); // Generates random number 0-5
Note: Math.floor returns the random number rounded down to the nearest integer.
Back to Menu
Browse Button |
Did you ever want to enable a web user to browse the hard drive from the click of a button on a web site. Well, now with a combination of C# and HTML, you can. In an HTML document, you will wan to use the following code:
Put this in the HEAD of the document:
Put this in the BODY of the document:
Marquees and Banners |
Marquees and banners are two ways to make scrolling tickers. Marquees are strictly HTML, but a banner uses a combination of Javascript and HTML. Look at the two below:
NOTE: This example uses attributes which are deprecated in HTML5. Please take a look at the HTML5 section to handle table borders, padding, and layout.
This is a Marquee:
This is accomplished with the following simple 3 lines of HTML:
A banner using JavaScript is more complex, but also allows for more control of items like speed, etc. Code to create a banner in JavaScript is as follows:
Ensure that for the banner, you make the BODY tag look something like this:
Back to Menu
JavaScript if Statements in detail and Mathematical Operators |
Many of the scripts on this page use if statements in JavaScript. There are multiple dimensions to a JavaScript if statement as discussed below.
A JavaScript if statement uses this format:
The else statement does not necessarily have to be there depending on what you are doing.
In the parentheses above where it says "(condition)," you would use the following types of conditional and Boolean operators:
| (a == b) | a equals b |
| (a !== b) | a does not equal b |
| (a > b) | a is greater than b |
| (a >= b) | a is greater than or equal to b |
| (a < b) | a is less than b |
| (a <= b) | a is less than or equal to b |
| (a > b && b > 5) | a is greater than b and b is greater than five |
| ((a > b)||(b > 5)) | a is greater than b or b is greater than five |
Visit http://www.javascriptmall.com/learn/lesson5.htm for detailed explanations.
Don't forget about mathematical operators!
| a=b | assigning equals, such as a is b. |
| a==b | comparative equals, used for if a is b |
| a + b | a is greater than b |
| a-b | a minus b |
| a/b | a divided by b |
| a*b | a times b |
| a%b | a modulus b (modulus yields the remainder. If b divides evenly into a, the modulus is 0. If a is 5 and b is 2, then the modulus is 1.) |
HOT TIP!!! using value=(a==1)?1:0; is the same as if (a==1) {value=1} else value=0;
Back to Menu
Case Statements |
Sometimes instead of using multiple if statements, it is easier to use case statements. The JavaScript below will prompt someone to enter a number based on the choices and then uses case statements to determine which action to take. It is a simple script, but its application can be great:
Back to Menu
Hovering Text |
Sometimes it is hand to have hovering text appear as when a mouse hovers over an image and ALT allows text to be displayed. What if you wanted this to work with text, not images. Try the following code out to see this desire come to reality (Internet Explorer ONLY):
Take special notice of how Style Sheets are used and consider what you can change in the coding to make it work. To those who know Spanish, the division labels in the coding are the Spanish words for red, blue, gold, brown, and life, respectively: rojo, azul, oro, marron, and viva. This may help clarify the coding a bit.
Back to Menu
Fading to a Page |
If you have clicked on a link that doesn't open up a new window as in
target="_blank"but actually leaves this particular page (such as this link: Jamie's Quick Links), you notice how it seems to fade from this page to another page. This is amazingly simple to do and is accomplished by putting the following HTML in the HEAD section of an HTML document (older IE based browsers ONLY):
<meta http-equiv="Page-Exit" content="revealTrans(Duration=2.0,Transition=12)" />
For this to work, make sure that you do not include
target="_blank"before the
>in
<a href="put URL here">tags.
Back to Menu
Browser Detection |
Using different browsers can produce different results. That's why there are small icons for browser compatibility with each section of this page. Look at the bold statement below in multiple browsers. Depending on what you are using, it will change based on a script running in the background.
How does this page know what browser you are using? This is accomplished with the following script:
You can also use this script:
This script has the following output:
You can also put HTML coding in the single quotes of the document.write statements, making this a potentially powerful tool for working with various browsers. That's how I made the statement bold.
NOTE: if you want to avoid scripting and are using Internet Explorer, then you may be interested in visiting the section about Internet Explorer Conditional Statements.
And finally, what about Safari? Well, use the following code within JavaScript to detect Safari:
Next, use the following to determine what to do:
For a great example, thanks to Quirksmode and Apple Developer Connection, a great example of browser detection is here (view the source) or visit Quirksmode.
Showing Plug-ins in Firefox 
You can also use this coding, thanks to Sams Teach Yourself JavaScript in 24 Hours to show plug-ins (with some modification from Jamie):
NOTE: This example uses attributes which are deprecated in HTML5. Please take a look at the HTML5 section to handle table borders, padding, and layout.
And finally, here is some additional browser information that may be of interest:
Here is the script:
Using CSS to check for IE
Say all you care about is whether or not someone is using Internet Explorer, but you do not want to use a script to determine it. You can use "star masking" to apply specific CSS rules for IE. Click here for more information on CSS. Here's the code:
<style type="text/css">
#noIE {
 display: inline;
 *display: none;
}
</style>
<p><strong>You are <span id="noIE">not </span>using Internet Explorer.</strong></p>
And here's the output:
You are not using Internet Explorer.
Embedding Media in a Web Page |
Would you like to embed a movie into your web page, such as a Windows Media Player or QuickTime file? Well, with a simple bit of coding, this is possible.
If you want to embed a Windows Media Player file, use the following code:
If you want to embed a QuickTime file, use the following code:
If you want to embed a Real Media video, use the following code:
If you want to embed a YouTube video using standard code (as opposed to the code provided by YouTube), use the following code:
If you want to embed a .FLV file, download this Flash media player and use the following code:
In the above FLV example, the mediaplayer_4.0.46.swf is the player you download and the image is used for display prior to playing the media. Here's a demonstration.
Notice in the above examples how parameters can be controlled with either "True" or "False".
HTML5 Video and Audio
Of course HTML5 simplifies embedding media greatly as shown below:
<video src="http://howzyerteeth.beacondeacon.com/scifi/Chewbacca/Pringles-Win-the-Jedi-challenge.mp4" controls="controls">
video not supported
</video>
A more in-depth way to code video is to code with multiple formats, specifying MIME types and codecs:
<video controls="controls">
<source src="video.ogv" type='video/ogg; codecs="theora, vorbis"'>
<source src="video.mp4" type='video/mp4; codecs="avc1.42E01E, mp4a.40.2"'>
video not supported
</video>
<audio src="http://www.beacondeacon.com/ichthus/personal/Ma-Ma/bing_swingonastar_clip.mp3" controls="controls">
audio not supported
</audio>
NOTE: If the above video and audio clips are not showing and you have verified that the media files are present, then it is likely HTML5 is not supported in your browser (the above would render that it is not supported if that is the case) although some items will not show up based on file format (e.g., .wav files).
Back to Menu
Drop Down Menus |
Making a drop down box menu is relatively simple, but getting it to do what you want can be complex. Below are two useful examples of drop boxes with the coding provided:
This is accomplished with the following coding:
There are a couple things to take note of. First, I have marked names in red and green that are critical to the coding. Notice how the script uses names of the form and select items. Also notice how the options of the form are understood as an array (as denoted by [ ]) in the JavaScript. Finally, notice that based on the value you selected, you can feed the value into the JavaScript, which allows for powerful results as a result of the selection, such as calling a function, displaying a customized web page, using variables, etc. Finally, note also the "selected value" to set the default value of the form in the HTML above.
Now look at this next example. It uses the same properties as the above (names and such), but has a unique function in that it goes to another web site. Take special note of what accomplishes this in the coding below:
This is accomplished with the following coding:
Note how I used size="4" to change the appearance of the menu in this latter example.
Another Example:
Let's have fun! In this example, the user can make a selection on the drop-down menu and the picture above it changes.
This is accomplished with the following coding:
Note the use of the this keyword. For more information on this, refer to http://www.quirksmode.org/js/this.html.
Note the use of the eval(img + ".src") function, which evaluates the string value captured by the variable img with the appendate ".src" and then executes it (adds .src to img).
For more information see Forms - A Summary.
Back to Menu
Radio Buttons |
partly |
Radio buttons offer another way to make selections. Getting the radio button's value is similar to that of Drop Down Menus. Try the example below:
This is accomplished with the following code:
Notice that I added a second value, the secret identity, which allows me to do even more with the script. I used "value2" within the "input" tag to accomplish this. Notice that I can use the name attribute in input types of radio as it is not deprecated in this usage, but I cannot use multiple identifiers as they are intended to be unique. For more information see Forms - A Summary.
Back to Menu
Check Boxes |
If you want to allow multiple choices, unlike Radio Buttons and Drop Down Boxes, then you may want to use check boxes. Look at the following example:
This is accomplished with the following code:
Notice that I can use the name attribute in input types of checkbox as it is not deprecated in this usage, but I cannot use multiple identifiers as they are intended to be unique. For more information see Forms - A Summary.
Back to Menu
TextAreas and Input |
If you don't want to use prompting boxes for input and would rather have the user type input rather than click as in Drop Down Menus, Radio Buttons, or Checkboxes, then try using text areas
This is accomplished with the following code:
Note how I include some very basic validation in the script, as well as how I force the secret word to be limited to 16 characters, the field to be limited to a size of 24, and how I use similar attributes with the actual textarea. Notice also how I use an image as an alternative submission button. For more information see Forms - A Summary.
Back to Menu
Buttons with Functions |
Now let's take a look at buttons that have their own individualized functions. Consider the following:
This is accomplished with the following code:
Take special notice of how the function uses its name in the form. Also notice how I used a single quote in Darth Vader's quotation without disrupting the coding and confusing the end-of-string. For more information see Forms - A Summary.
Here's another button with a function, which sends you to another page when you push it:
The code is as follows:
Finally, you can put buttons in your page that allow one to navigate forward and backward based on browser history.
It uses minimal code:
Back to Menu
Forms - A Summary |
In the above few sections, there is information regarding forms, using drop down menus, radio buttons, checkboxes, textareas and input, and buttons with functions. Now let's combine these all in a form that also e-mails out the information. Try the form below:
This is accomplished with the following coding:
NOTE: You will want to change the e-mail address and the subject "FormTest" to something you prefer.
Notice that I can use the name attribute in input types of radio or checkbox as it is not deprecated in this usage, but I cannot use multiple identifiers as they are intended to be unique.
And finally, in working with forms, it is handy to use the onsubmit event in form tag to validate the form before the action is executed such as in E-mail Address Validation.
HTML5 brings new considerations for forms:
New Input Types including range (with slider control), date, datetime, week, month, time, search, color, and number (which can be used with min, max, and step attributes below).
New Attributes: novalidate (for form element), autocomplete, autofocus, min, max, step, pattern, placeholder, required
Labels: <label for="email">E-mail: </label> prior to <input id="email" type="email" />
Back to Menu
FontSwap: Changing the Font Size, Color, and Style on a Web Page (THE OLD WAY) |
What if you are writing a web site that may involve readers who need to change the font size? written a simple example as shown below. In this example, the user sees the words Can you see me now??? and has links underneath to choose small, medium, or large. Upon clicking on a link, the size of the text changes and the user gets the altered page with the same words, but underneat a link to restore the original font size. This is accomplished with the following coding (Compatible with Internet Explorer only!):
Note: You must save this code in a file named fontswap.htm unless you change the filename in the code. The filename must match the name you give it in the code (in the example it is fontswap.htm. Also note that with this type of coding, users can change the color, style, and other attributes besides font size by just adding some variables and some CSS coding as described in the Cascading Style Sheets section.
Here's another example of this type of technology:
Using the code below, one can click a link to enter in several attributes regarding the text to get a different color,
font size, and font style (family). Here is the code for this:
With this example, the file must be saved as pledge.htm unless one alters the coding to match the name given.
Yet, there are even more effective methods that can be applied to this. Refer to Hiding Text to see a method of hiding text, which could also be applied to changing font color. Also see Cascading Stylesheets (CSS) for additional methods.
Back to Menu
Is JavaScript Enabled? |
Though this should be at the beginning of this page, it is here nonetheless. Below I provide 2 sets of code, one That uses JavaScript and one that uses strictly HTML to help a user know if he or she has JavaScript enabled. See the code below:
Method 1:
The above example is strictly HTML. If it is placed in the coding (preferably in the HEAD section), it will forward the user to the URL listed in the code. Note that if you wanted to, you could just put HTML coding without having it forward to another site, but rather, allow the user to see a message and/or a link.
Method 2:
NOTE: This example uses align="center", which is deprecated in HTML5. Please take a look at the HTML5 section to see acceptable ways to align content.
This above method is a little less intrusive, but requires the user to click a link if JavaScript is not enabled. It's concept is simple enough. If JavaScript is enabled, then a red "Yes" appears under the question, "Is JavaScript enabled?" If it is not enabled, there is no red "Yes" under the question and instructions are provided for the user to click on the link below. It uses HTML to give the instruction and JavaScript to put a red "Yes" if enabled.
Back to Menu
Authenticatorsby Jamie Johnson |
Similar to the aforementioned Synchronized Randomizer, I have used similar technology to have a person
enter a code to proceed, a technology that is useful in preventing the spamming of web sites with forms, etc.
I have 2 examples.
This first set of coding involves popping up a window with a code in it that must be entered if the user proceeds:
This second set of coding involves using a form to enter the code:
Back to Menu
Tables: Caption and TH |
Often forgotten in tables are the Caption and TH tags, but they can be very useful. See the following table below:
NOTE: This example uses attributes which are deprecated in HTML5. Please take a look at the HTML5 section to handle table borders, padding, and layout.
| Superhero/Villain | True Identity |
|---|---|
| Batman | Bruce Wayne |
| Superman | Clark Kent |
| Darth Vader | Anakin Skywalker |
| Spiderman | Peter Parker |
| Scarecrow | Dr. Krane |
This is accomplished with the following:
Back to Menu
Strings(single quote, length, numbers, indexing, substrings, case, and special characters) |
There are various useful methods when dealing with Strings in JavaScript. Some have been used on this page, but not described in detail. This section attempts to do that.
Single Quote within a document.write
Consider when you want to use document.write in JavaScript, but the string you want to write contains a single quote. Look at these strings generated by JavaScript (The same string is written with 2 different methods):
How do you write the string without disrupting the document.write statement? Here are 2 ways, the second way being the more efficient way:
Of course, you can use double-quotes in a document.write like this: document.write("I'll be home for Christmas.");
Length of a String
How many letters are in the word antidisestablishmentarianism?
Here is the script:
Numbers to String and vice versa
Use these statements in JavaScript to convert a number (variable num2convert):
To convert a string to a number, simply do the following:
Variable e, then, becomes a number, since by multiplying by 1, JavaScript knows multiplication is for numbers.
Indexing of Characters
What if you want to find the position or certain characters or what character is in a certain position in a string? Consider the following:
This is accomplished with the following:
Take notice how I used +1 for positioning or used 7 for the 8th position. This is because indexing starts at 0, not 1.
Splitting
This is accomplished with the following:
This ignores spaces and assigns the following values:
bisection[0] = 'I';
bisection[1] = 'like';
bisection[2] = 'to'; // note the difference: frogtodissect[2] is 'l' since it is the character of the string at index 2.
bisection[3] = 'play';
bisection[4] = 'Frogger.';
Substrings
Consider the following which lists the string and 2 substrings:
The first substring starts at index position 4 (recall that index starts at 0) and concludes before index position 9. It uses substring.
The second substring starts at index position 4 and goes for 5 characters (uses substr).
This is accomplished with the following code:
Converting Case
Consider the following where a lower-case alphabet is the string. What if you want to make it all caps? Then again, what if you want to make an all caps string lower-case? See below:
This is accomplished with the following script:
Special Characters to use in JavaScript:
| JavaScript Code | Result |
|---|---|
| \" | " |
| \& | & |
| \\ | \ |
| \n | new line |
| \r | return |
| \t | tab |
Back to Menu
Delayed Button |
What if you want to have a button delayed? An example might be when you want to ensure someone takes time on a page before proceeding to another page, etc. The following code will accomplish this:
Back to Menu
Titlebar Ticker |
Making your titlebar change can be done with this script from Codebelly.com:
Back to Menu
Printing a Page |
There are various methods of printing a page. You can insert a button on a page to print the page using this code:
You can use a similar method, but put an image instead of a button using this code:
You can use a link with this code:
Of course, you can incorporate this into a larger script using the window.print() command.
Back to Menu
Floating Mail/Moving Box |
What if you want a small box to float on the page where you can enter an e-mail address to send the URL? CodeLifter.com shows how to do this. Use the following code:
This can be a very powerful tool for other uses as well by applying similar applications of this script.
Back to Menu
Scrolling Background |
In Internet Explorer, you can make the background scroll behind the text. This is accomplished with the following code from CodeFoot.com:
Back to Menu
Background Image Slideshow |
If you want to have background images display as a slideshow in your browser, this can be accomplished with the following code provided by CodeLifter.com:
Back to Menu
Very Basic XML |
XML is unlike other coding on this page. It is used to describe what you want to display in HTML. You make up your own tags in XML, but they must be nested properly and there must be a root. XML kind of allows you to arrange the data, but HTML is what actually displays it. Make sure to use quotes around attibutes that typically come after an equals sign (=). XML is also case sensitive. Comments are coded just like in HTML. Elements cannot have spaces, begin with xml, XML, or Xml, or a number. The root element is the set of tags in which the others fall. The others are child elements (and if they have the same parent, they are siblings). Though it is beyond this text,
<![CDATA[ Text to be ignored ]]>is used to have the parser ignore text. For more info go to http://www.w3schools.com/xml/.
Cut and paste the following and save it as swchar.xml (notice the layout, the made up tags, and how CHARLIST is the root and parent of the CHARACTER siblings:
Now, looking at this in Internet Explorer won't show anything. Think of this more as your data set. XML allows the data to be more easily separated rather than embedded in the HTML. Now, you have to create the accompanying HTML file to display this data. Cut and paste the code below and save it as swchar.html:
NOTE: This example uses attributes which are deprecated in HTML5. Please take a look at the HTML5 section to handle table borders, padding, and layout.
Look how relatively short the HTML is. Note that this only works in IE-based browsers.
XML allows you to also create HTC files to specify behaviors in Internet Explorer. The HTC file in the below example uses XML and JavaScript. It can be specified in the Style section of an HTML document to affect certain items on a web page.
Copy and paste the following coding and save it as patriot.htc:
Now you need the HTML that utilizes the HTC file. Cut and paste the following code and save it as patriot.html:
Now open Internet Explorer and have fun!
For more information and for detailed XML training, please visit http://www.w3schools.com/xml/.
There is more you can do and in other browsers. Refer to the XSL section.
Back to Menu
Introduction to XHTML |
XHTML is simply eXtensible HTML. It looks very similar to HTML, but follows some coding standards. This page is not in XHTML, but is close to XHTML. Some of the coding that is copyrighted is not in XHTML format, and for that reason, this is not in XHTML, but I will cover the basics. If you know HTML, then XHTML is not that far of a jump. Here are the basics:
- ALL TAGS must be closed. This means they have a beginning and an ending. For those that do not have concluding
tags (a.k.a. "empty tags"), they end with /> (e.g. img, br, hr, input, link).
- USE lower-case for tag names!
- img tags have use id=, but also inclue the older name= (for older browser compatibility), and alt as well.
- Whether it is src, name, id, height, width, border, or whatever, if it comes after =, i.e., an attribute value, it should have " around it.
- Tags must be properly nested.
- No lazy input tags. Rather:
<input checked="checked" />
<input readonly="readonly" />
<input disabled="disabled" />
<option selected="selected" />
<frame noresize="noresize" /> - All XHTML documents must have a DOCTYPE declaration. The html, head and body elements must be present, and the
title must be present inside the head element. - A good XHTML 1.0 Transitional DOCTYPE declaration:
- Ensure that the head of the XHTML document includes the following:
- The following modules are DEPRECATED: applet, legacy, and name usage outside of certain form elements (This is why I include id as well as name outside of certain form elements) such as radio buttons and checkboxes.
- The following tags are DEPRECATED: font, embed, u, and center.
To learn more about XHTML, please visit http://www.w3schools.com/html/html_xhtml.asp.
To validate your XHTML coding, please visit The W3C Markup Validation Service.
Back to Menu
Hover Menus |
Using CSS, one can make sophisticated menus that are dynamic in their appearance and content. This is accomplished using Cascading Style Sheets along with HTML -- no scripting!
Horizontal Hover Menu Example
This first example is from Dynamic Drive DHTML.
Here’s the code:
Take special note of the a:active and border-style attributes.
Vertical Hover Menu
Now, let’s get vertical. This uses some similar concepts to the above.
Here’s the code:
NOTE: The menu font colors will not necessarily show up properly in IE due to the overlap of CSS within this entire page. However, using the code I have above will display the font color appropriately.
Here's a simple example where one can click on a menu item and have sub-menu items appear:
Here's the code to accomplish this:
Here's another simple example where if you hover over a menu item, a sub-menu will appear:
Here's the code to accomplish this:
Back to Menu
Dynamic CSS Highlighter, an example |
What if there are styles that one wants the user to change based on mouse action. Well, I have put together a "highlighter" example below to show this in action! Here’s the example:
Highlighter
Mouse over highlights me, but clicking removes the highlight.
"So be it, Jedi, if you will not be turned, you will be destroyed!"
Try letter-by-letter:
L
e
t
t
e
r
-
b
y
-
L
e
t
t
e
r
This is accomplished with the following code:
NOTE: height, width, borderColor, color, and other properties can be used instead of backgroundColor as depicted in the script.
Back to Menu
"Forgotten" Tags and Entities (Symbols) |
Some tags and entities in HTML are more commonly used than others. However, there are some tags, still acceptable in HTML 4.0, while not common, are quite useful:
<fieldset> & <legend> & Suits in a Card Deck
The coding is amazingly simple and requires NO graphics files! Here’s the coding:
NOTE for alternative coding:
| spades | ♠ |
| clubs | ♣ |
| hearts | ♥ |
| diamonds | ♦ |
Also, you may be wondering how I got the <pre> effect with <fieldset> & <legend> in this line or above without skipping to a new section? I used the <tt> tag as such: <tt>whatever you want to appear like pre</tt>. <code>, <samp> & <kbd> are similar to <tt> (teletype).
<base> tag
If you put the following in the <head> section of a document, you can just specify links and files and images as file names instead of putting the entire URL:Now you can use <img src="duke_dog.jpg"> instead of <img src="http://educ.jmu.edu/~johns2ja/duke_dog.jpg">
text formatting
Here is regular text: hello
Now look below:
<big>hello</big> hello
<small>hello</small> hello
<ins>inserted hello</ins> inserted hello
<del>deleted hello</del> deleted hello
various forgotten tags
var, defn, cite, and em tags are like the i tag (italics).
quotations
’ is a right single quote. ‘ is a left single quote.
<q> displays an opening double quote, whellole </q> displays a closing double quote.
These quotes actually curve somewhat unlike the common " double quotes.
This uses the q tag.
"This uses the " symbol."
NOTE: q tag will not work in Internet Explorer, hence you should use an &entity; in IE.
You may want to use ” or “ which make ” or “, respectively.
Symbol Font
Since the font tag is deprecated, one turns to CSS to use font-family:symbol, but in some browsers (non-IE often), this does not work. There is another way that is cross-browser compatible. Here’s how:
| Α | Α | Capital Alpha |
| α | α | small alpha |
| Σ | Σ | Capital Sigma |
| σ | σ | small sigma |
| ς | ς | small final sigma |
| Υ | Υ | Capital Upsilon |
| ϒ | ϒ | Hooked upsilon |
| υ | υ | small upsilon |
Besides the two exceptions listed above, if you know the name of a Greek letter, you can create it!
Now let’s look at other entities.
Mathematical and Currency Entities
| ∀ | ∀ | For every/for each/for all/for any |
| ∂ | ∂ | partial differential |
| ∃ | ∃ | For Some/There Exists |
| ∅ | ∅ | Empty Set/For none |
| ∈ | ∈ | is an element of |
| ∉ | ∉ | is not an element of |
| √ | √ | square root |
| ∞ | ∞ | infinity |
| ∠ | ∠ | angle |
| ∩ | ∩ | intersection |
| ∫ | ∫ | integration |
| ∴ | ∴ | therefore |
| ≈ | ≈ | approx. equal to |
| ≠ | ≠ | not equal to |
| ≤ | ≤ | less than or equal to |
| ≥ | ≥ | greater than or equal to |
| ⊂ | ⊂ | subset of |
| ⊄ | ⊄ | not a subset of |
| ⋅ | ⋅ | dot operator |
| π | π | pi = 3.14159265… |
| ¢ | ¢ | Cent |
| £ | £ | Pound |
| ¥ | ¥ | Yen |
| € | € | Euro |
| ± | ± | Plus or Minus |
| ƒ | ƒ | function of |
| × | × | multiplication |
| ÷ | ÷ | division |
| > | > | greater than |
| < | < | less than |
Arrows
| ← | ← | left arrow |
| → | → | right arrow |
| ↑ | ↑ | up arrow |
| ↓ | ↓ | down arrow |
| ↔ | ↔ | biconditional (horizontal) arrow |
| ↵ | ↵ | carriage return/enter arrow |
With the exception of crarr above, use a capital A to make the arrows into double arrows.
Other Entities
| ∇ | ∇ | Inverted Triangle |
| ♠ | ♠ | spades |
| ♣ | ♣ | clubs |
| ♥ | ♥ | hearts |
| ♦ | ♦ | diamonds |
| • | • | bullet |
| § | § | section |
| ® | ® | registered trademark |
| © | © | copyright |
| ™ | ™ | trademark |
| … | … | horizontal elipsis |
| ¡ | ¡ | Inverted Exclamation |
| ¿ | ¿ | Inverted Question |
| & | & | ampersand |
For a thorough list of entities using the &#number method, please visit Entities.
Back to Menu
Focus & Select |
What if you come across a text area that is displayed and would like to "focus" the mouse cursor there without having to click in the text area? What if you want to select all the text without dragging and clicking? Look at this example:
Here's the code:
Back to Menu
Throw Function and Error Checking |
The JavaScript Throw Function has multiple uses. Use the code below to test its use in error-handling user input:
One can also use onerror for error checking as shown below (with thanks to http://w3schools.com/js/js_onerror.asp):
Back to Menu
Hiding Text |
Hopefully, you have seen how to swap pictures, but what if you want to make text disappear and reappear? Look at the following example:
So be it, Jedi, if you will not be turned, you will be destroyed. Don't make me destroy you. You don't know the power of the Dark Side. Your powers are weak!
Here is the code:
Take special notice that this uses the visibility property of CSS.
This means that you could use document.getElementById("mycontent").style.visibility="visible" in a variety of ways such as document.getElementById("mycontent").style.color="red"
Another example:
This is the first heading
This is the second heading
Here's the code:
Display Method to Hide
These methods can also be accomplished using the display method in CSS:
What's the answer?A second item
Notice that when visible, the display pushes the information underneath it ("A second item") downward and pull the second item back up when the display is turned off. This works differently than the visibility method in CSS in that visibility:hidden will not move the information underneath in Internet Explorer, leaving blank spots where the display is on or off. The display method remedies this.
Here's the code for the display method:
The display method can also be used with graphics.
Back to Menu
Timing |
What if you want to make a certain event occur after a certain period of time. For example, say you want to have an alert box appear after 2 seconds. Here's the code:
This uses the setTimeout command in JavaScript. Notice that it issues the command in double quotes and then a comma, and then the amount of milliseconds; hence, it has the following format:
Back to Menu
Cookies |
 |
Cookies are a powerful way to control events in a web page. For example, if someone visits a site and does not have a cookie for that site, it may ask for the user's name. Say the user enters, "Jack" at the prompt. Then, on subsequent visits, it says, "Welcome back, Jack!" Or it may be that when you visit a page, it makes an announcement via an alert, but doesn't make the announcement if the user has been there before using that particular browser. This is accomplished with cookies.
Cookies are handled typically with 3 actions: checking, getting, and setting. First, you want to check for a cookie, which means you get the cookie if it exists. If it does not exist, then you set the cookie. See the code below:
NOTE: in the above example, c_name is like a meta-variable in that it is a variable that stores the name of the variable gotit, which in turn stores the actual data. Don't get confused and think that c_name stores the actual data, when it stores a variable's name.
Back to Menu
Modification Date |
Sometimes a web site provides the date when it was last modified. Often, it does not. There is a way in many pages to find this information. In your browser, put the following in the address bar (Thanks to Emily Perry):
This will usually provide the date and time of the last modification. On some web sites, it will not work. It may just provide the site URL (such as in Safari). I have found that on sites which have active scripting creating part of the page during the visit, the script will only give the current time since the script technically "modifies" that page in that time.
Back to Menu
z-index and absolute/relative positioning |
Typically when you put various images on a page, they are not on top of one another. However, this changes with the use of the CSS z-index and absolute or relative positioning. Both absolute and relative positioning allow you to essentially put images (or other objects) within the same space. The z-index is like the Z-axis in 3-D geometry where the higher the value, the higher the level of display.
In the example below using absolute, when you implement the code, you will see 3 overlapping images. They will appear somewhat in the same space,
but not directly on top of one another. Look at the inline CSS code to see how this is done using position:absolute
and then take notice of how I used z-index to determine which one is on top. I then created
JavaScript to elevate the z-index of the image (bring it to top) when the image is clicked.
This demonstrates a powerful use of JavaScript and CSS in that I can control a specific property of the CSS
without having to swap sheets.
Absolute positioning, however, keeps an object in the same position regardless. Relative positioning keeps
and object in position relative to what is around it. Both use z-index. For example, if I want an object, say a
picture, to always be 10 pixels from the top and 10 pixels from the left, then I would use position: absolute; top: 10px; left; 10px;.
However, say I want an image to overlay the upper left corner of the division in which it is coded, but move with it based on screen resolution, but be offset from it to the left,
then I would use position: relative;. See the relative positioning example below:

You could put content here.
Here's the code for the relative positioning example:
The absolute positioning example is not literally shown since it would not fare too well on a long-scrolling page like this one (notice above that the relative positioning one does fare quite well).
Here's the code for an absolute positioning example:
Here's a better way to do it using parameters:
One other interesting piece of CSS code that can be used in conjunction with absolute positioning is clip. Again, an example will not be shown due to the nature of absolute positioning on a page of this size. Look at the code below:
What that does is clips a rectangle of the image with the following coordinates:
Upper left corner: 100 pixels down.
Upper right corner: 475 pixels to the right of the left edge.
Lower right corner: 350 pixels down from the top edge.
Lower left corner: over to the 0 pixel position to the left (all the way to the left). This will also determine the horizontal placement of the upper left point since it is a rectangle.
NOTE: The code above allows the image to be clickable to link to the original source so you can really see the effect.
More information about Cascading Stylesheets (CSS)
Back to Menu
Making Your Own JavaScript Objects |
Some objects are inherent in JavaScript, such as Date and document, but you can also make your own. Look at the following code (notice the function objects that are arbitrarily made - name, work):
Copy-and-paste and give it a try! For more information on the this keyword, please visit http://www.quirksmode.org/js/this.html.
Back to Menu
Changing/Appending Text |
You have seen how to swap images and changing styles, but how about changing text "on the fly." Look at this example:
I need different text, please
However, there are limitations with this OLD method and what you enter into the field will be treated as text. Even if you enter HTML coding, they will show up as text characters and you will actually see the code. A better method to change text is to use innerHTML, where you can put HTML code or just text. To mimic the example above, look below:
innerHTML Example: I need different text, please
Here's the code:
You can also use a similar method to the first OLD changing text example in order to append text, but it comes with the same limitations. See the example below:
Type a sentence and click the Add button to append to this paragraph.
Here's the code:
As with the examples above, innerHTML is a better way to append text (and you can use HTML elements, not just text if desired). Here's the example:
Can you add to me?
Here's the code:
A fun innerHTML example by Jamie Johnson (view source to see the code I used).
CAUTION: Since one can put any HTML coding into the forms using the innerHTML methods, this also means one can put inline CSS and inline scripting in as well!
Back to Menu
alt and title attributes and abbr/acronym tags |
When you put alt within an img tag, in Internet Explorer, it provides some information about the picture. However, this does not work in Firefox. You can use title to make this happen in Firefox.
For example, you can do as follows (When you hover over the picture, an alt-like effect should work in Firefox.
Also see the code below):
The abbr or acronym tag function similarly to the use of alt, but for text. Look at the example below and hover over the USA. These tags do not work inherently in Internet Explorer, but thanks to http://www.sovavsiti.cz/css/abbr.html, there is a nice work-around.
God bless the USA. (This uses abbr)
God bless the USA. (This uses acronymn)
Here's the code:
Back to Menu
Screen Resolution |
In some cases you may want to consider screen resolution. See below:
NOTE: This example uses align="center", which is deprecated in HTML5. Please take a look at the HTML5 section to see acceptable ways to align content.
This can be accomplished through a simple JavaScript function (move to the end of the document.write statement to see the essentials):
The following make this work:
screen.width
screen.height
Now you can use conditional statements (e.g., if (screen.width<1024)) to check a screen's height or width to determine an action (using a different style sheet, etc.).
Controlling screen and print media in CSS may be of interest, as well.
Back to Menu
Bugs & Hacks |
 |
 |
I do not consider myself a hacker or bug tracker. I tend to code in a way that is minimalist and streamlined with the goal to function across platforms and browsers. However, this is not always possible, and therefore, I do have a couple of "bugs"/"hacks" to share:
IE7: Unlinkable Links Adjacent to Collapsible Content
I found an interesting bug in IE7. If a division containing links is floated to the right of collapsible content that is shorter than the division when collapsed, then only links (in the floated right division) within the same height of the collapsed content will work. Others will not work until the collapsible items are expanded. What I had to do was encapsulate the collapsible content in its own division. Then IE7 works well in such a scenario like all other browsers. For an example of such content (that has been made to work in IE7, please refer to http://beacondeacon.com. On a page like http://www.jmu.edu/computing/helpdesk/selfhelp/GPOs.shtml, it does not matter as much since on that page, the collapsible area is always greater in height than the area containing links to its right.
Firefox on Mac: Restoring Visibility for Overflow:scroll
I found an interesting CSS/JavaScript hack for Firefox on Mac. If an object has a style allowing scroll for overflow and is set to visible, then when a JavaScript function makes the scrolling and the object hidden, one has to make a function to make them visible. However (AND HERE'S THE HACK!), to enable full functionality and visibility in Firefox on Mac, one has to use JavaScript to enable overflow to scroll BEFORE one makes the object visible. This is demonstrated when one closes the "window" on the following pages:
- http://www.jmu.edu/computing/helpdesk/selfhelp/Leopard/
- http://www.jmu.edu/computing/helpdesk/selfhelp/Leopard/desktop/
For Internet Explorer Conditional Statements, please review the next section.
Back to Menu
Internet Explorer Conditional Statements |
Sometimes you want to use produce certain results based on the browser. The most thorough method is as is described in the Browser Detection section. Often, Internet Explorer is the culprit that requires the exception or hack. Well, one nice thing about Internet Explorer is that it has built into it the ability to use conditional statements within HTML coding, which requires no scripting whatsoever. It's and IE hack so to speak. Well, here's the code to do it:
Similar to Perl, you can use "lte" for less than or equal to, "gt" for greater than, and "gte" for greater than or equal to.
NOTE: ONLY IE 7 will detect these conditional statements.
If you are interested in making CSS properties apply only in IE, you can simply put an asterisk in front of it like so:
*font-size: 25px;
Back to Menu
Refreshing a Page |
There may be some times where you want to refresh a page. Certainly this can be accomplished easily using the F5 key on a Windows machine or Command R (Apple R) on a Macintosh. However, there may be times where you want a button to allow the user to refresh the page. Say you have a page which generates a random number when it loads. The user might press this button to have it generate a new random number for instance. Thanks to Tony Van Noordt (with a couple of XHTML/coding modifications by me) here is the code:
Back to Menu
E-mail Address Validation |
A specific use of validation is to check if an e-mail address is valid or not.
Back to Menu
Create Your Own Objects in JavaScript |
JavaScript is an object-oriented language. You can even create your own "objects." And just as objects in the real world have properties. JavaScript objects can, too. Let's create an object called hero.
Check out the following example where I created hero objects and wrote one output function to handle the objects:
Here's the code:
Notice I did not use quotes in the onclick events since Batman, Superman, and Spiderman are actual objects. I am passing an object to the function via the myhero parameter, not a string.
Back to Menu
JavaFX Clock |
JavaFX is a programming language I started tinkering with in early 2009 and as you can see from The Amazing Clock, Analog Clock and Simple Clock examples, you can see I like clocks. JavaFX allows for rich animation and is built atop the Java codebase.
I have removed the rendering due to slowing down load time of this page. You can visit my Clocks! page to see it in action if it is supported by your browser/configuration.
You may need a download from http://java.com/en/download/manual.jsp to get this to work. If you just see the Java logo and wheel spinning, then that is most likely the issue. However, if you are using Internet Explorer and you still see the Java logo and wheel spinning after you have the current installation of Java, then ensure that you are running Internet Explorer as an administrative user (Caution! As a general rule, don't run a browser as an administrative user for general internet use).
I won't put the code here since it is covered here: http://java.sun.com/javafx/1/tutorials/build-javafx-nb-app/index.html.
And out of my enjoyment of the clocks, visit my Clocks! page to see lots of clocks (not just JavaFX) in action.
Back to Menu
Hover Boxesby Jamie Johnson |
I saw the effect below done in Flash and decided to use CSS and JavaScript to emulate it. So, here goes:
NOTE: This example uses align="center", which is deprecated in HTML5. Please take a look at the HTML5 section to see acceptable ways to align content.
1
2
3
4
5
6
How did I do it? Here's the code:
Let's step this up a notch. I changed the code above slightly to work with graphics and to make them smaller than the hover boxes so they fit nicely on the screen. I also made them linkable and created a hover navigation, so to speak. Check this out:


And here's the code:
Click for a more complex version of this method that I wrote for my personal site's navigation.
Back to Menu
Detecting Flash |
As seen with the Analog Clock, Flash is needed for some things to work. So, if you are using Flash on a site, it is a good idea to put a script in place to detect if Flash is installed and if not, to inform the user appropriately. For example, look at the box below:
The following is the code for the script to detect Flash. If there is a Flash object involved, you may want to include scripting to hide the object if Flash is not detected so you won't see the "broken object" in certain browsers, or the white space where the object would be if Flash was installed.
I revisited this in 2013 with mobile devices in mind. I came across some code that works for both desktop and mobile browsers. I modified it a little bit, with alternate code from the original source:
Back to Menu
Search Code |
Say you want to put a search on your web site. The the search form below will use Google to search http://educ.jmu.edu/~johns2ja/:
Here's the code to do it:
A more involved version is available at my portal.
Back to Menu
Sharing on Social Sites/Like Button |
How do you share your site with social sites like Facebook and Twitter? Look at below:
Here's the code to do it:
Pay careful attention to the code for the Like button so that the button allows persons to Like the correct page or site.
Back to Menu
HTML5 |
Browser Support Coming… Some, but certainly not all, newer browsers support HTML5 |
With the abandonment of XHTML 2.0 in 2006, W3C and WHATWG seemed to merge with agreement on HTML5 as the replacement to XHTML and prior versions of HTML as well as the HTML DOM. It has many new features such as canvas (using SVG), video/audio tags, local storage and offline web app (via cache manifest) capabilities and more. It is still a work-in-process. The embed tag is back and there are a host of new tags. There are also new type attributes for better input control. More is deprecated, i.e., NOT supported. I have tried to note throughout this document items to consider with HTML5. Other notes are below:
New Elements
article, aside, audio, canvas, command, datalist, details, figcaption, figure, footer, header, hgroup, keygen, mark, meter, nav, output, progress, rp, rt, ruby, section, source, summary, time, video, wbr, col, colgroupStructure
The Code:
<div id="html5layout" style="width:434px;text-align:center;margin:auto"><header style="border:1px solid black">header</header>
<div class="middle" style="border:1px solid black;">
<nav style="width:25%;float:left;border:1px solid black;height:103px;">nav</nav>
<div class="central" style="width:50%;float:left;border: 1px solid black">
<section style="border:1px solid black;height:100px;">section
<header style="border:1px solid black;margin:0px 2px 0px 2px">header</header>
<article style="border:1px solid black;margin:0px 2px 0px 2px">article<br /></article>
<footer style="border:1px solid black;margin:0px 2px 0px 2px">footer</footer>
</section>
</div>
<aside style="border:1px solid black;height:103px;">aside</aside>
</div>
<footer style="clear:left;border:1px solid black">footer</footer>
</div>
<nav> around navigation</nav>, <section id=""> around sections</section>, <header> around h1-h6 and other text items that are headers in nature</header>
New Attributes
scope attribute for style tag to limit CSS to one part of the doc
Deprecated Attributes
align attribute deprecated - use CSS
type attribute no longer used for style tags
type and language attributes no longer used for script tags
type attribute deprecated for li, ul, ol - use CSS
start attribute deprecated for ol
Also see tables
Video & Audio
Of course HTML5 simplifies embedding media greatly as shown below:
<video src="http://howzyerteeth.beacondeacon.com/scifi/Chewbacca/Pringles-Win-the-Jedi-challenge.mp4" controls="controls">
video not supported
</video>
A more in-depth way to code video is to code with multiple formats, specifying MIME types and codecs:
<video controls="controls">
<source src="video.ogv" type='video/ogg; codecs="theora, vorbis"'>
<source src="video.mp4" type='video/mp4; codecs="avc1.42E01E, mp4a.40.2"'>
video not supported
</video>
<audio src="http://howzyerteeth.beacondeacon.com/sound/gijoe_by_arthur.mp3" controls="controls">
audio not supported
</audio>
<audio src="http://beacondeacon.com/sounds/starwars.wav" controls="controls">
audio not supported
</audio>
NOTE: If the above video and audio clips are not showing and you have verified that the media files are present, then it is likely HTML5 is not supported in your browser (the above would render that it is not supported if that is the case) although some items will not show up based on file format (e.g., .wav files).
Forms
Input Types including range (with slider control), date, datetime, week, month, time, search, color, and number (which can be used with min, max, and step attributes below).Attributes: novalidate (for form element), autocomplete, autofocus, min, max, step, pattern, placeholder, required
Labels: <label for="email">E-mail: </label> prior to <input id="email" type="email" />
Deprecated Elements
acronym, applet, basefont, big, center, dir, font, frame, frameset, noframes, s, strike, tt, u, xmpNo body attributes!
Clarification on allowed elements
iframe, embed, and b are all allowed.DTD
Simplified to <!DOCTYPE HTML>Meta
Streamlined Meta tags:HTML 4.01: <meta http-equiv="content-type" content="text/html; charset=ISO-8859-1">
HTML 5: <meta charset="ISO-8859-1">
Anchors
<a id="anchorname" /> as well as <a id="anchorname"></a> are fine.Tables
border, cellspacing, cellpadding, frame, rules, and width are all deprecated attributes for the table tag while summary (new in HTML5) is allowed. abbr, align, axis, char, charoff, height, nowrap, scope, valign, and width are all deprecated attribures for the td tag while colspan, headers, and rowspan are allowed. The attribute deprecation for the th tag is the same as the td tag, except scope is allowed. HTML 4.0.1 attributes deprecated/not supported for thead or tbody. align, char, charoff, and valign are deprecated for tr.With the removal of many table attribrutes, use CSS classes like the following for borders and padding:
table { border: 3px solid black; }
td { padding: 3px; border: 3px solid black; }
Also see the demo below:
Alignment Demo and Additional Notes
With the ending of align="center" and valign="center", I recommend using CSS as shown and demonstrated below and apply classes as needed:
.aligncenter { margin:auto; text-align:center; }.valigncenter { vertical-align: middle; }
Horizontally-Centered Items

Wilson Hall
Sometimes, this still won't work. A great tip is to have a container styled text-align: center with child elements (image or iframe embedding a video, etc.) styled display: inline; like this:
This works on pictures and videos such as YouTube's iframe embed code (just style the iframe to display: inline). Here is the code:
<div style="text-align: center;">
<img style="display: inline;"id="WilsonHallPic" src="http://www.jmu.edu/photography/wm_library/L22410B_04.09.10_041.jpg" title="picture of Wilson Hall" alt="picture of Wilson Hall" />
</div>
<img style="display: inline;"id="WilsonHallPic" src="http://www.jmu.edu/photography/wm_library/L22410B_04.09.10_041.jpg" title="picture of Wilson Hall" alt="picture of Wilson Hall" />
</div>
Vertical Alignment
|
This table cell has no alignment properties applied, but is using the browser default. |
Vertically-Centered | Top-Centered |
The above table cells are using <td>, <td class="valigncenter"> and <td class="valigntop">, respectively. Note that the valigntop class uses this rule: .valigntop { vertical-align: top; }
Additional Notes
The following are especially helpful in understanding HTML5: Dive Into HTML5, HTML5 Reset Stylesheet, and W3Schools - HTML5
Back to Menu
XSL |
XSL (Extensible Stylesheet Language) uses XSLT (XSL Transformations) to change XML to (X)HTML as shown in the example below. Look at the source code for an XML file:
Yet, if you actually view the XML file, instead of showing the above code as many XML files would show, it shows text not present in the XML file and the XML data organized -- even sorted and styled -- due to the second line, which refers to batman.xsl (i.e. XSL file using XSLT).
The secret to manipulating the data and output is controlled by the XSL file. Here is the code for the XSL:
Notice the syntax and nesting used. Also take special notice of the entities used for greater than and less than comparison. Be careful to look at all the code INCLUDING the HTML comments to understand this code.
Some things to take special notice of:
<xsl:for-each select="villains/villain"> begins a for each loop that selects values within <villains><villain>
<xsl:value-of select="alias"/> then grabs the value appearing between the opening <alias> and closing </alias> tags.
<xsl:choose> is used in conjunction with <xsl:when test="appeared < 1950"> in similar fashion to how case statements are used.
Again, look at the coding comments closely for additional details.
More:
If there was an e-mail address or page involved that was designated by <contact-email> in the XML, then you might do something like this to render it using XSLT:
<xsl:for-each select="contact-email">
<a href="mailto:{.}"><xsl:value-of select="."/></a>
</xsl:for-each>
<a href="mailto:{.}"><xsl:value-of select="."/></a>
</xsl:for-each>
The use of {.} allows using the value in the href attribute. The . between the curly cue brackets {} refers to self, in this case contact-email. If the . is replaced with contact-email, the same thing occurs, but the . is much more efficient.
If there is HTML code in the value you are seeking, do not use value-of, but use copy-of instead like this: <xsl:copy-of select="article-text"/>
If you are wanting an attribute of an XML tag, e.g. the 12345 in <system-block id="12345"> you do this:
<xsl:for-each select="system-block">
<xsl:value-of select="@id"/>
</xsl:for-each>
<xsl:value-of select="@id"/>
</xsl:for-each>
You can use variables, if statements, translation and concatenation like this (example only; there are more efficient ways):
<xsl:for-each select="persons/person">
<xsl:variable name="gen">
<xsl:if test="gender='Male'"> <!-- The data uses Male and Female for gender -->
<xsl:value-of select="translate(gender,'M','m')"/>
</xsl:if>
<xsl:if test="gender='Female'">
<xsl:value-of select="translate(gender,'F','f')"/>
</xsl:if>
</xsl:variable>
<p><xsl:value-of select="concat('The gender of ',name,' is ',$gen,'.')"/><br />
Contains "Manager" in positoin title? <xsl:value-of select="contains(position,'Manager')"/></p>
</xsl:for-each>
You can count as well: There are <xsl:value-of select="count(persons/person)"/> persons in the file.
You can also implement sub-string functionality (substring, substring-before, substring-after) as well as sorting. Refer to the XSL file or the code in the textbox above for more details.
One more example of XSL
Open XSL/employees.xml and you will notice the output that lists 3 employees. However, if you view the source, you see four employees. Using XSL/employees.xsl, I am able to repeat a process for each employee similar to how a function works in scripting and am able to control attributes to determine who displays and who does not display. I will highlight the function-like call-template and attribute control. Here's the XSL code:
<xsl:stylesheet xmlns:xsl="http://www.w3.org/1999/XSL/Transform" version="1.0">
<xsl:template match="employees">
<html><body>
<h1>Employees</h1>
<xsl:for-each select="employee">
<xsl:call-template name="employment"/> <!-- like calling a function -->
</xsl:for-each>
</body></html>
</xsl:template>
<!-- Below is a lot like a function -->
<xsl:template name="employment">
<div>
<xsl:variable name="appearance">
<xsl:if test="dynamic-metadata[name='display']/value = 'Yes'">block</xsl:if>
<xsl:if test="dynamic-metadata[name='display']/value = 'No'">none</xsl:if>
</xsl:variable>
<xsl:attribute name="style">
<xsl:value-of select="concat('display:',$appearance)"/>
</xsl:attribute>
<h3>
<xsl:value-of select="dynamic-metadata[name='employeename']/value"/>
</h3>
</div>
</xsl:template>
</xsl:stylesheet>
A couple of fantastic resources for XSLT are the following:
XSLT Cookbook by Sal Mangano, published by O'Reilly Media, Inc.
Essential XML Quick Reference by Aaron Skonnard and Martin Gudgin,
published by Addison-Wesley
Back to Menu
Fundraising Thermometer by Jamie Johnson |
Here's my very own JavaScript fundraising thermometer that does not require Flash. All you have to do is change the RAISED amount and it does the rest:
| GOAL: | $100,000 |
| RAISED: | $77,000 |
towards our goal!
Don't forget to get the images:
thermometer.gif
fullthermometer.gif
Here's the code:
NOTE: If you use this, please do include the comment that gives credit to me (James "Jamie" Arthur Johnson) and the URL.
Back to Menu
jQuery |
jQuery is a JavaScript library. You must download a script from http://jquery.com and refer to it as an external script for your site. Then, you can use jQuery.
Since jQuery is built on JavaScript, the JavaScript you have learned can be intermingled with jQuery.
This is just a taste of it - the tip of the iceberg.
Recall CSS. What is a selector? If you want to reference a paragraph then in CSS, the selector would be p. If you want to reference something with class="alpha", then in CSS, the selector would be .alpha and if you wanted to reference something with id="beta", then the selector would be #beta.
So, remember selectors. To use jQuery, you have to use the $ to take advantage of selectors.
In plain JavaScript, you might do document.getElementById('beta'), but in jQuery, you just do this: $('#beta'), in both instances assuming a . (dot) operator and method follows.
And you can do it for classes, too: $('.alpha')
And yes, you can do it for anything that could be a selector in CSS, such as just a paragraph: $('p') or a div's child image: $('div img')
Think of any selector in CSS and that is how you use $.
The $(document).ready() function runs after the page (document) is loaded (ready):
/* JavaScript and jQuery code here */
});
Variables and control structures are the same in jQuery as they are in plain old JavaScript, though the variables may have a value that is based on a jQuery selector and function, which is also true for the conditions in control structures.
There are so many methods in jQuery. I will highlight some of my favorites. With the combination of $, selectors and methods, you can make powerful things happen.
First, let's assume the following HTML to use with the methods:
Add the class alpha to p#beta: $('p#beta').addClass('alpha');
Check to see if p#beta has the alpha class and if so, get and alert the value of the style attribute: if($('p#beta').hasClass('alpha')) { alert($('p#beta').attr('style')); }
Remove the class alpha from p#beta: $('p#beta').removeClass('alpha');
Set the style attribute of p#beta: $('p#beta').attr('style','background:yellow'); Take notice that it overwrites whatever was in the style attribute before.
Let's change the CSS: make the background of div.alpha #fffccc: $('div.alpha').css('background','#fffccc');
Let's make each paragraph have a box around it:
$(this).css('border','1px solid black');
});
Lets's make p#beta turn red when you click on it:
$(this).css('color','red');
});
This is a lot more efficient than using an onclick attribute in p#beta to call a function that does this: document.getElementById('beta').style.color="red";
Let's get the html (innerHTML) of p#beta and alert it: alert($('p#beta').html());
Again, this is more efficient than doing this: alert(document.getElementById('beta').innerHTML;
Let's set the html (innerHTML) of p#beta: $('p#beta').html('Who shot first? Han or Greedo?');
And once again, this is more efficient than doing this: alert(document.getElementById('beta').innerHTML('Who shot first? Han or Greedo?');
Let's hide p#beta (this is like doing a display: none in CSS): $('p#beta').hide();
Let's show p#beta (since we just hid it): $('p#beta').show();
Let's toggle (show/hide) p#gamma when we click on p#beta:
$('p#gamma').toggle();
});
Let's set p#gamma to toggle when the document loads:
$('p#gamma').toggle();
});
And a couple of more...
| jQuery methods | JavaScript attribute that would have to call a function |
|---|---|
| mouseover() | onmouseover |
| mouseout() | onmouseout |
| mousedown() | onmousedown |
| mouseup() | onmouseup |
Remember, this just scratches the surface. Head over to jquery.com and learn more!
To play with these demos more directly, use this code:
Back to Menu
Org Chart |
Here's a simple Org Chart I wrote using some HTML markup and CSS3.
Back to Menu
Additional Helpful Links |
The following are helpful links:
- 2 tablespoons
- 20 Typography Rules Every Designer Should Know
- A List Apart
- Accessify.com
- AHREF.com (February 2011 Archive version of the site)
- Basic Web Resource Site: HTML Tutorial (2009 Archive of site)
- Cheat Sheet for Brilliant Color Combinations
- Codebelly.com
- CodeFoot.com
- CodeLifter.com
- CSE HTML Validator (Windows, Free lite version)
- CSS Play
- CSS ZenGarden
- CSS3.info
- design float
- Dive Into HTML5
- DZone - fresh links for developers
- EchoEcho.Com - Complete Web Tutorials
- Encycolorpedia - everything color for CSS and HTML
- Envato Tuts Plus - Learn How To Code (Formerly NETTUTS)
- Essential XML Quick Reference
- Favicon Generator
- Fiddle Widdle | Browse CSS Templates
- Free CSS Templates
- gotAPI/HTML - Instant search in HTML and other developer documentation (Archive of site, which was taken down 2013)
- Guru99 (various tutorials including web tutorials with Java, SQL, PL/SQL, VBScript, Python, Perl, Linux, JavaScript, Apache and PHP)
- How to Create (JavaScript, CSS, HTML, Design Tutorials)
- How to Make a Website
- HTML.com - HTML and CSS for Beginners
- HTML, CSS and PHP: The Ultimate Cheat Sheet
- HTML Dog: HTML and CSS Tutorials
- HTML Help by The Web Design Group
- HTML-Kit
- HTML Software and Resources (including History)
- HTML Writer's Guild
- HTML5 Doctor
- HTML5 Periodic Table
- Introduction to Cascading Style Sheets (CSS)
- IT Hare on Soft.ware: A Beginner's Guide to Programming Languages
- JavaScript Kit
- JavaScript Mall for Webmasters
- JavaScript Workshop
- jQuery - fast, concise JavaScript Library
- jQuery Cheat Sheet
- Koders.com (Open Source Code Search Engine)
- Learn More About Domains & HTML (from Marca®ia.com - International Domain & Trademark Registration)
- Mako CSS
- Meyerweb CSS
- Mozilla Developer Center
- NCSA - A Beginner's Guide to HTML
- nVu (Cross Platform WYSIWYG editor - Free)
- Page Resource JavaScript Tutorial
- Periodic Table of HTML Elements
- Position is Everything (CSS)
- Quirksmode: web development, CSS and JavaScript tips and tricks
- Resource Roundup: Creating a Website for Your Business | Praxent
- Sams Teach Yourself HTML 4 in 24 Hours
- Sams Teach Yourself JavaScript in 24 Hours
- SitePoint
- tech @ Beacon Deacon
- Text Wrangler (Mac, Free)
- Tizag Tutorials
- The Ultimate HTML5 Cheat Sheet on WPKube
- W3 Schools
- The W3C Markup Validation Service
- Web Designer Wall
- Web Developers Notes JavaScript Tutorial
- Web Page Analyzer from WebSiteOptimization.com
- WebDeveloper.com
- Webpositionadvisor.com Page Size Checker and related tools
- XSLT Cookbook
Back to Menu